
Even a MORON can have a nice stereo !!!
#1
 09-27-2009, 09:06 PM

Even a MORON can have a nice stereo !!!
And I'm gonna prove it !! I will try to get this thread together as fast as possible. I will leave a couple of 'empty' spots that I can go back in a fill out. So if you are watching this thread, you might have to backtrack to see new stuff.
I have not installed a stereo since about 1980, when I put a cassette deck , with an 80 watt 7 band equalizer, and a set of 6 X 9's in my '66 mustang. So I had NO CLUE what I was getting into, or how to install it.
My local stereo shop wanted OVER $500 just for installation, so I had to learn it for myself.
OK, here we go !!!
I had a few guys that had LAID OUT systems that I hung out with, ...........so , of course I wanted better.
First, the components for this install.
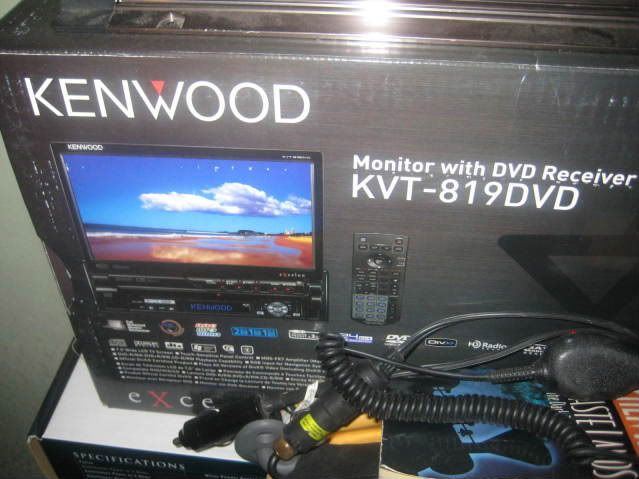
The head unit is a KENWOOD KVT819 DVD. This is the newest , top of the line Kenwood DVD with a 7incd screen. It had the highest preamp output , at 5V, so that is why I bought it. It retails at $1200, but here are some deals out there.
And I'm gonna prove it !! I will try to get this thread together as fast as possible. I will leave a couple of 'empty' spots that I can go back in a fill out. So if you are watching this thread, you might have to backtrack to see new stuff.
I have not installed a stereo since about 1980, when I put a cassette deck , with an 80 watt 7 band equalizer, and a set of 6 X 9's in my '66 mustang. So I had NO CLUE what I was getting into, or how to install it.
My local stereo shop wanted OVER $500 just for installation, so I had to learn it for myself.
OK, here we go !!!
I had a few guys that had LAID OUT systems that I hung out with, ...........so , of course I wanted better.
First, the components for this install.
The head unit is a KENWOOD KVT819 DVD. This is the newest , top of the line Kenwood DVD with a 7incd screen. It had the highest preamp output , at 5V, so that is why I bought it. It retails at $1200, but here are some deals out there.
#2
09-27-2009, 09:07 PM
Next, I bought the retro install kit from BIKETRONICS. Awesome product, awesome customer service. I had to call them for something, because I'm a MORON, and they helped me out.
I also bought the "Rockin' Rings" from Aaron Oregon. He treated me GREAT too !!!
Here is a pic of those 2 things. Shoulda opened the Biketronics box, but you'll see the unit on the install pics !!

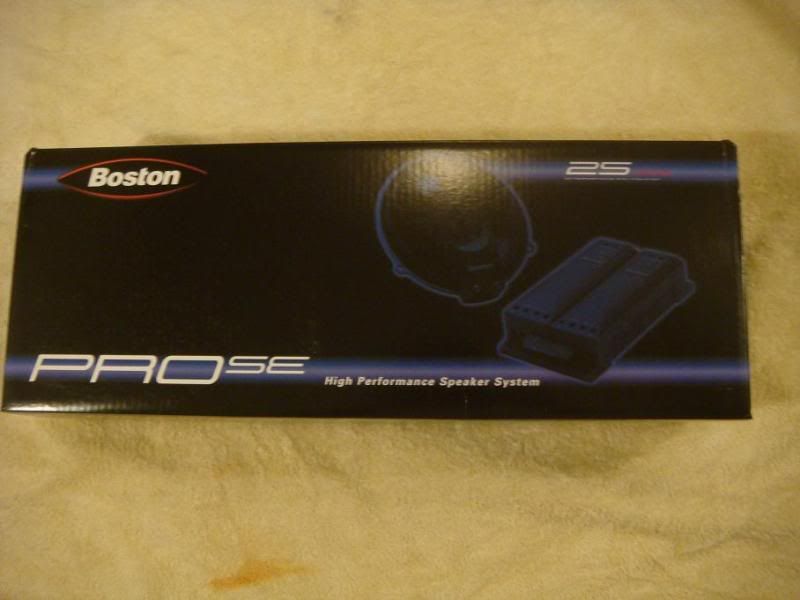
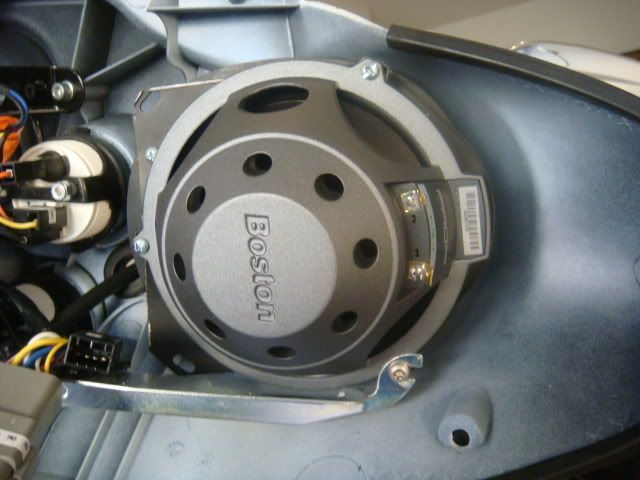
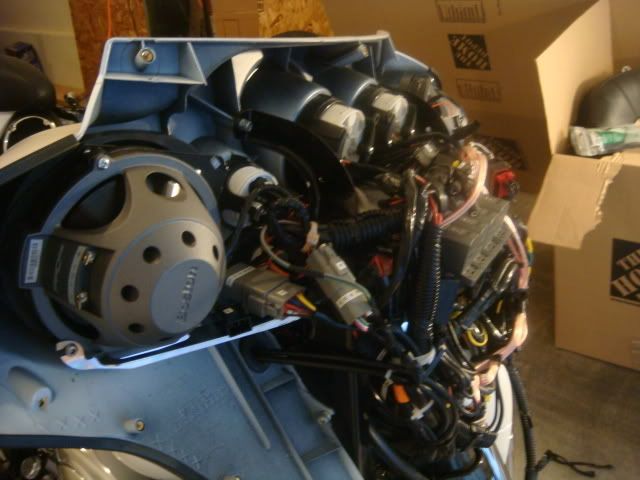
The front fairing speakers are BOSTON ACCOUSTIC PRO SE60, 6 1/2 " component speakers. Probably too much money spent on a speaker, as they retail for $600, but you can find deals on them !!
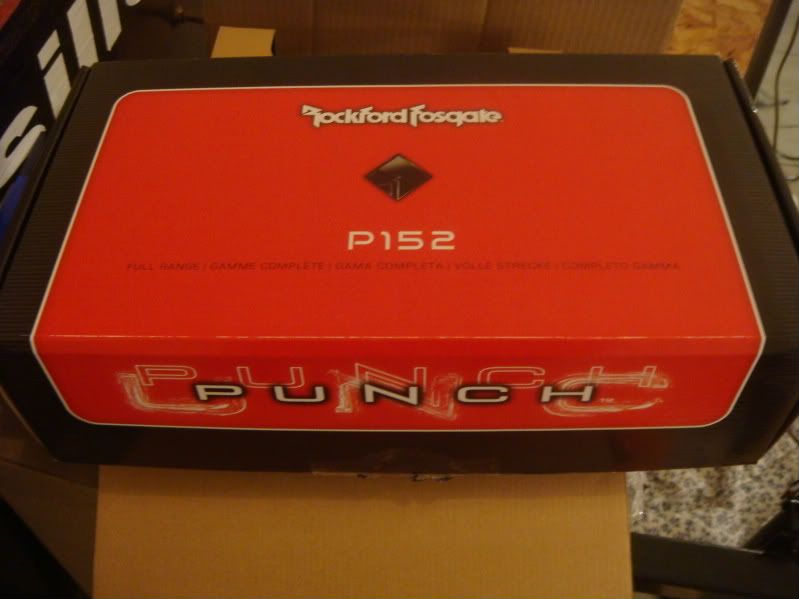
The passenger seat "speaker pod" speakers are Rockford Fosgate P152. A very inexpensive 5 1/4 " speaker, that sounds pretty decent.
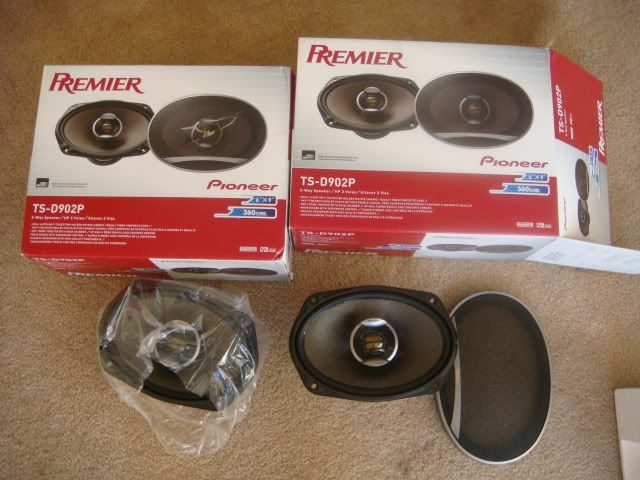
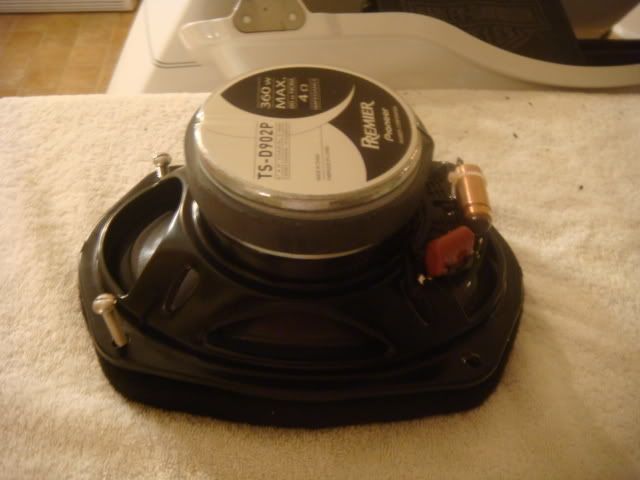
The speakers for the hard bags are PIONEER PREMIER TS D902P. For a 6 X 9 , they pack a BIG PUNCH !!
And now the power plant for this system: TWO, yes I said 2, ALPINE PDX 4.150 amps. These amps are 600 watts each, and are 4 channel. That's 150 watts of clean power for each speaker, on it's own channel. A whopping 1200 total watts !!!
Found a pic of the BIKETRONICS RETRO INSTALL MODULE.

Here are the hard bag spacers that a local stereo shop made for me. This was the only thing that someone else had to do for me.

I will be listing step by step instructions, so that anyone that is as dumb as me , will know that they can do it too !!
I also bought the "Rockin' Rings" from Aaron Oregon. He treated me GREAT too !!!
Here is a pic of those 2 things. Shoulda opened the Biketronics box, but you'll see the unit on the install pics !!
The front fairing speakers are BOSTON ACCOUSTIC PRO SE60, 6 1/2 " component speakers. Probably too much money spent on a speaker, as they retail for $600, but you can find deals on them !!
The passenger seat "speaker pod" speakers are Rockford Fosgate P152. A very inexpensive 5 1/4 " speaker, that sounds pretty decent.
The speakers for the hard bags are PIONEER PREMIER TS D902P. For a 6 X 9 , they pack a BIG PUNCH !!
And now the power plant for this system: TWO, yes I said 2, ALPINE PDX 4.150 amps. These amps are 600 watts each, and are 4 channel. That's 150 watts of clean power for each speaker, on it's own channel. A whopping 1200 total watts !!!
Found a pic of the BIKETRONICS RETRO INSTALL MODULE.
Here are the hard bag spacers that a local stereo shop made for me. This was the only thing that someone else had to do for me.
I will be listing step by step instructions, so that anyone that is as dumb as me , will know that they can do it too !!
Last edited by GLACIERPEARL; 09-28-2009 at 07:58 AM.
#3
09-27-2009, 09:08 PM
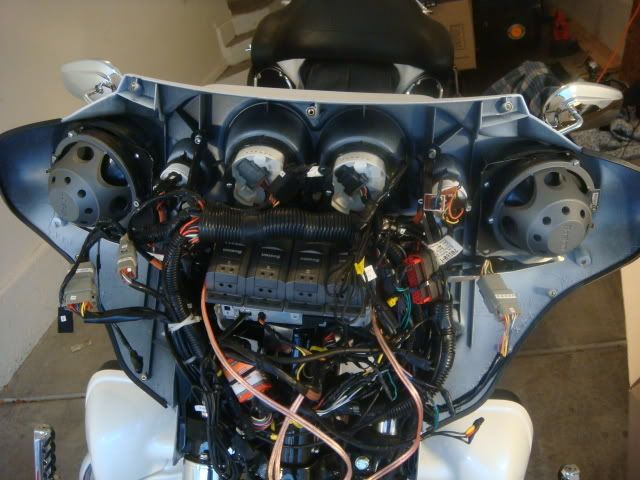
First , I removed the outer fairing . I took a lot of pics, so that I could get everything back together correctly !!

I removed the factory radio and speakers, and sold them to a fellow forum member for $500. The BIKETRONICS RETRO install kit, just bolts to the side of the after market radio, and slides back into the original cradle. It feels like the 2 pieces are made of some sort of poly composite.
DO NOT overtighten the mounting hardware !!
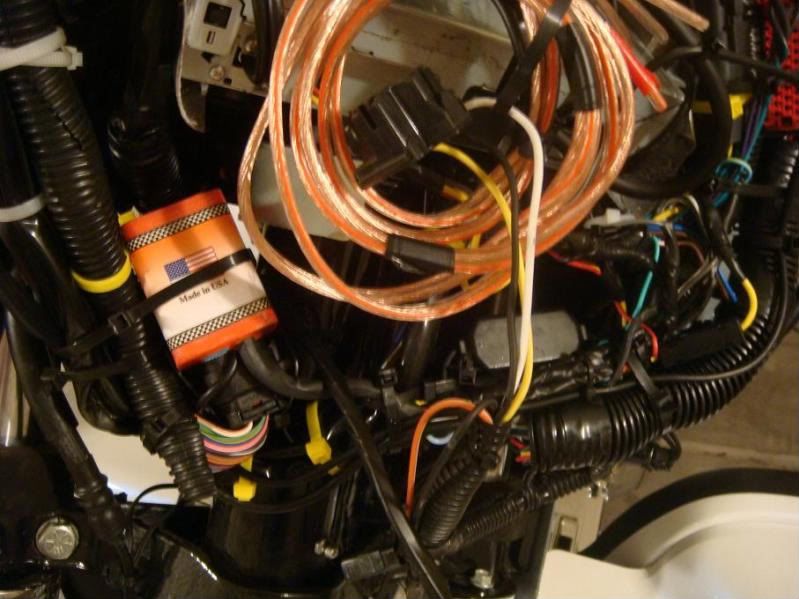
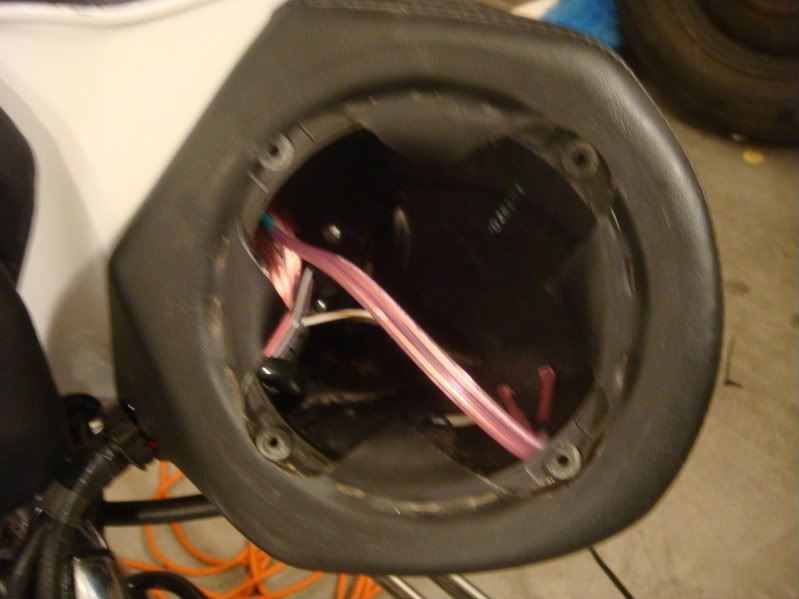
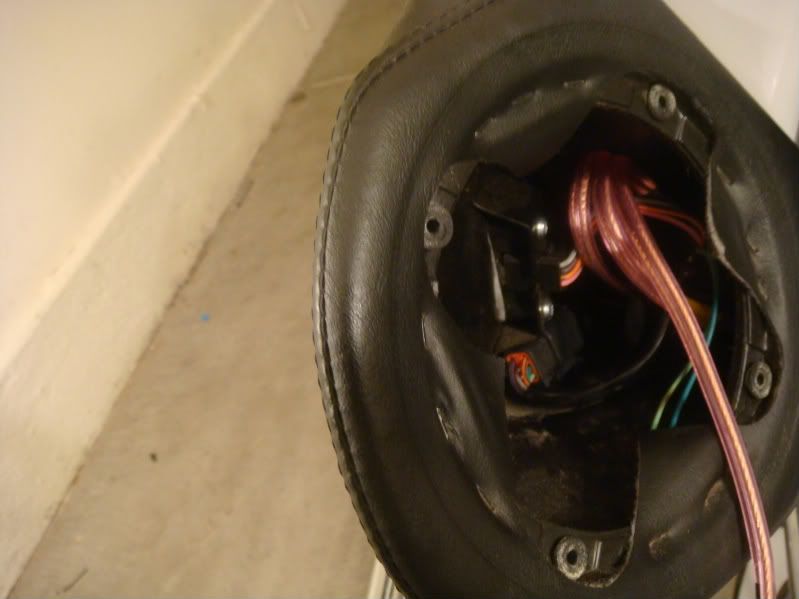
Next, you wire the BIKETRONICS AVC MODULE into the existing radio wiring harness.
It has a place where the factory plug snaps in. then, there are 12 wires , ( I think), that you need to hook up. I soldered all of mine together with a $ 9 solder gun from Radio Shack.
It has positive, negative, power, "steering wheel control" wire, and 2 wires for each of the four speakers. Very easy to hook up and understand. The unit also has a small red circle, with a set screw in the middle. This is where you chose the correct setting for your brand of radio.
Of course I didn't understand why my handlebar controls didn't work after the install. After a 3 second conversation with the fine people at BIKETRONICS, I figured it out. had the screw in the wrong setting !! DUH !! Told you I was stoopid.
Here it is installed with zip ties.
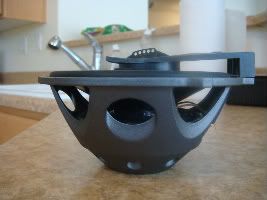
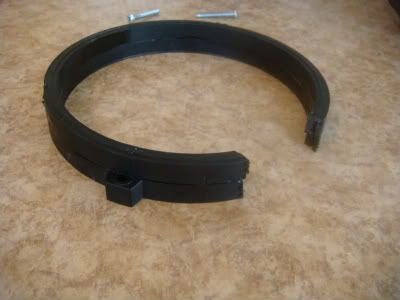
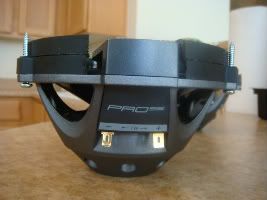
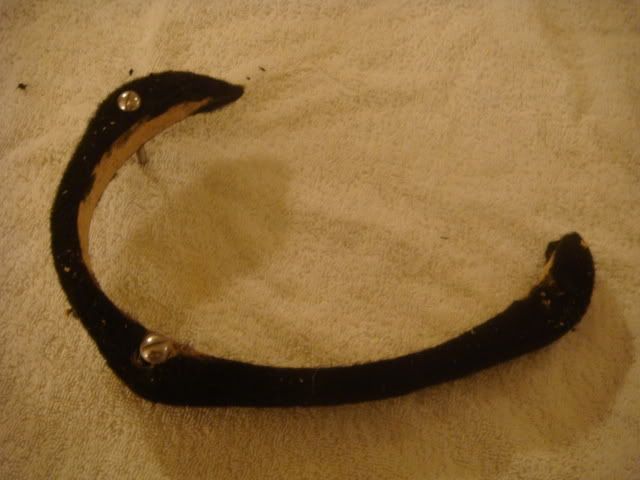
Next up are the 6 1/2 " BOSTON ACCOUSTIC PRO SE60's. These are component speakers, with separate mounts for the tweeters.
I had no problems installing the "Rockin' Rings" to the inner fairing. Very self explanatory, and all screws are included.
My first problem was that the tweeter mounts for the speakers were not flush. I went to the local stereo shop and bought 4 spacers, and cut out the space for the brackets, so they would mount flush in the fairing. Here are some pics , so that you can see the problem.
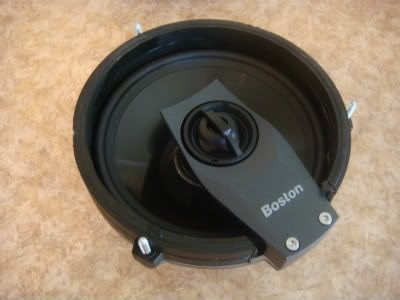
And here are the speakers , with tweeters installed, with 2 of 1/2" spacers installed.
And here they are, back in the fairing.
Didn't know if the batwing was gonna go back on after those THICK spacers, but it did !!
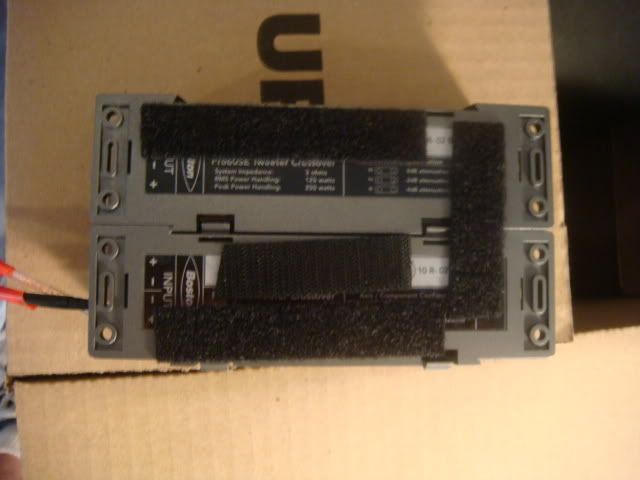
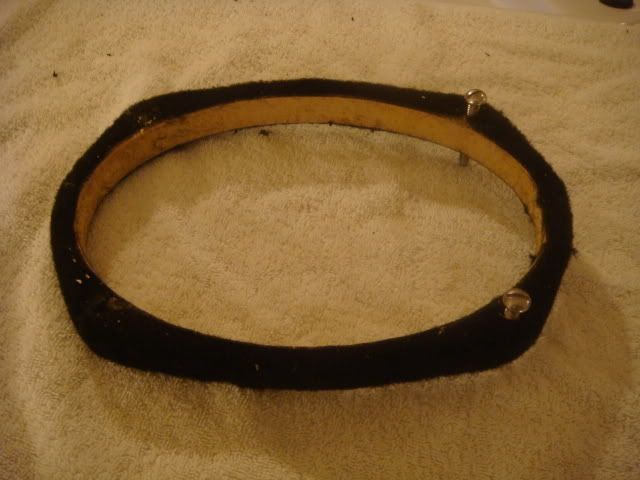
These speakers have VERY LARGE crossovers with them.

Until I opened the box, I'd never even seen a crossover, let alone know what it does !!
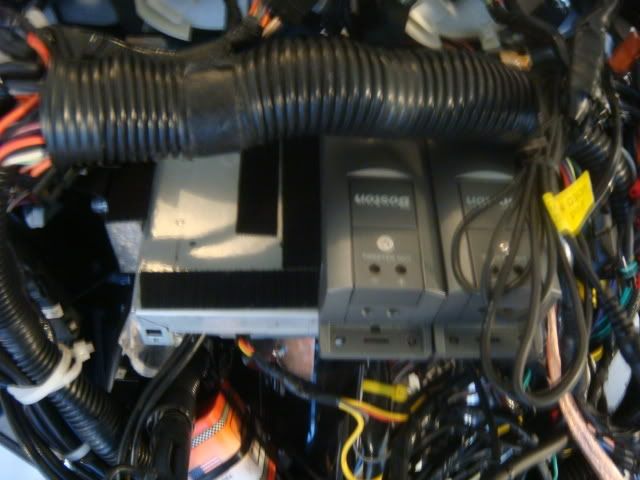
I used velcro to mount them to the top of my head unit. Worked pretty slick.
Here they are installed.
The guy at the local stereo hi fi shop sold me some "high output" speaker wire for my install. Don't know if it's any better, but I like doing things once, and right the first time. It was a very thick guage wire, 10 I believe.
All buttoned up !!

The stereo that I bought is a 2 piece unit. It has the head unit, and a brain where all the wires connect. I knew I was going to put the brain in the tourpack, so that is where all my wires will be going. I had to remove the tank and seat to continue.
I removed the factory radio and speakers, and sold them to a fellow forum member for $500. The BIKETRONICS RETRO install kit, just bolts to the side of the after market radio, and slides back into the original cradle. It feels like the 2 pieces are made of some sort of poly composite.
DO NOT overtighten the mounting hardware !!
Next, you wire the BIKETRONICS AVC MODULE into the existing radio wiring harness.
It has a place where the factory plug snaps in. then, there are 12 wires , ( I think), that you need to hook up. I soldered all of mine together with a $ 9 solder gun from Radio Shack.
It has positive, negative, power, "steering wheel control" wire, and 2 wires for each of the four speakers. Very easy to hook up and understand. The unit also has a small red circle, with a set screw in the middle. This is where you chose the correct setting for your brand of radio.
Of course I didn't understand why my handlebar controls didn't work after the install. After a 3 second conversation with the fine people at BIKETRONICS, I figured it out. had the screw in the wrong setting !! DUH !! Told you I was stoopid.
Here it is installed with zip ties.
Next up are the 6 1/2 " BOSTON ACCOUSTIC PRO SE60's. These are component speakers, with separate mounts for the tweeters.
I had no problems installing the "Rockin' Rings" to the inner fairing. Very self explanatory, and all screws are included.
My first problem was that the tweeter mounts for the speakers were not flush. I went to the local stereo shop and bought 4 spacers, and cut out the space for the brackets, so they would mount flush in the fairing. Here are some pics , so that you can see the problem.
And here are the speakers , with tweeters installed, with 2 of 1/2" spacers installed.
And here they are, back in the fairing.
Didn't know if the batwing was gonna go back on after those THICK spacers, but it did !!
These speakers have VERY LARGE crossovers with them.
Until I opened the box, I'd never even seen a crossover, let alone know what it does !!
I used velcro to mount them to the top of my head unit. Worked pretty slick.
Here they are installed.
The guy at the local stereo hi fi shop sold me some "high output" speaker wire for my install. Don't know if it's any better, but I like doing things once, and right the first time. It was a very thick guage wire, 10 I believe.
All buttoned up !!
The stereo that I bought is a 2 piece unit. It has the head unit, and a brain where all the wires connect. I knew I was going to put the brain in the tourpack, so that is where all my wires will be going. I had to remove the tank and seat to continue.
Last edited by GLACIERPEARL; 09-28-2009 at 08:06 AM.
The following users liked this post:
Iculukn2 (05-11-2016)
#4
09-27-2009, 09:09 PM
When I took the tank off, I had a couple of short pieces of fuel line, with bolts in the end, to stick on/in the places where the lines came off. A helping hand from the ol' lady, kept gas leaks to a minimum. I also removed the seat.
I tried to run the main 'brain' harness and speaker wires under the long black cradle under the tank. However, my Ultra has WAY too many wires under there. I just zip tied the wires to the frame, cut off the excess on the zip tie, and rotated the 'knot' part under the frame.
I ran these wires to the back of the bike, and just let them hang, until I knew what I would do with them.
Next, I worked on the ALPINE PDX 4.150 amp install, since I was getting stroked on the delivery of my 6 X 9's.
I was originally gonna put one amp in each hardbag,( along with 2 of the 6 X 9's ) but I had a brainstorm to put them in the tour pack.
I had lots of opinions on what size wire to use for the power and ground. Once again, I went for the over-do it method !! Do it once, and do it right. I went with the 4 gauge.
I went to Best Buy, and bought some 4 gauge MONSTER amp install kits, with gold plated fuse holders. I also bought a KICKER gold plated distribution block, that let me run both of my 4 gauge power wires to it, then just one 4 gauge cable to the battery, via the gold plated fuse holder..
Here is a pic from their website.

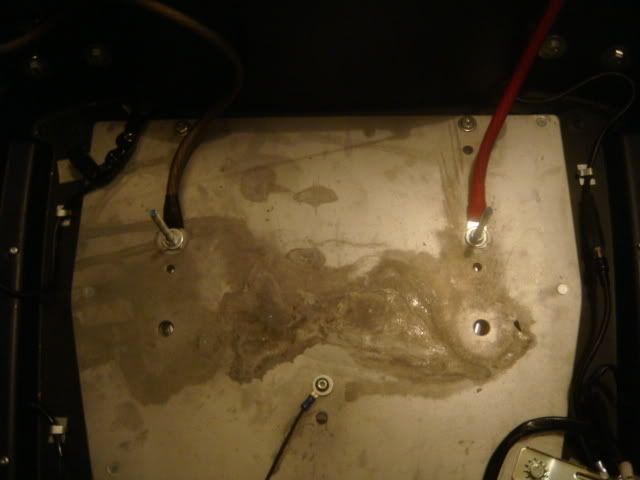
After I decided to mount the amps in the tour pack, I had to figure out how. Remember, I'm stoopid. I took out the fitted felt liner, and it looked like this, mounted on a big flat steel plate. So I figured since HD uses this spot for a ground, so could I !!
There are 4 bolts that hold the tour pack on. I took out the two front bolts, and cut some threaded rod.
I put the locknuts on the bottom where it mounts, slipped the eyelets of my ground cable over top, then put nuts
on to hold it all back in place. Then I drilled 2 holes in the form fitted felt tour pack liner, to allow my ground wires out. The liner has 2 raised "runners" where the bolts are, so I drilled as far forward on those as I could.
Install the liner back in the tour pack.
Next, I went to Home Depot and bought a piece of OSB board, ( pressboard), a half inch thick. I used my amp as a template, and drew it's diameter on the wood. I cut the wood by hand with my saber saw, ( if that's what it's called).
I drilled 2 holes in my board, to match the threaded rod. Then I went to WalMart, and bought a piece of felt in the fabric department. I also bought a $ 4 glue gun. I used the felt to cover the wood mount for the amps, and glued the felt in place.
Since it's the same size as the amps, and won't be too noticable, .....so it doesn't have to be perfect. You'll see it in the pics UNDER the amps.
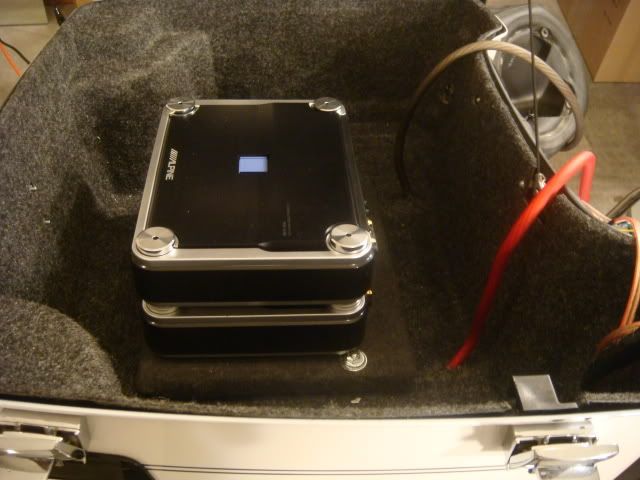
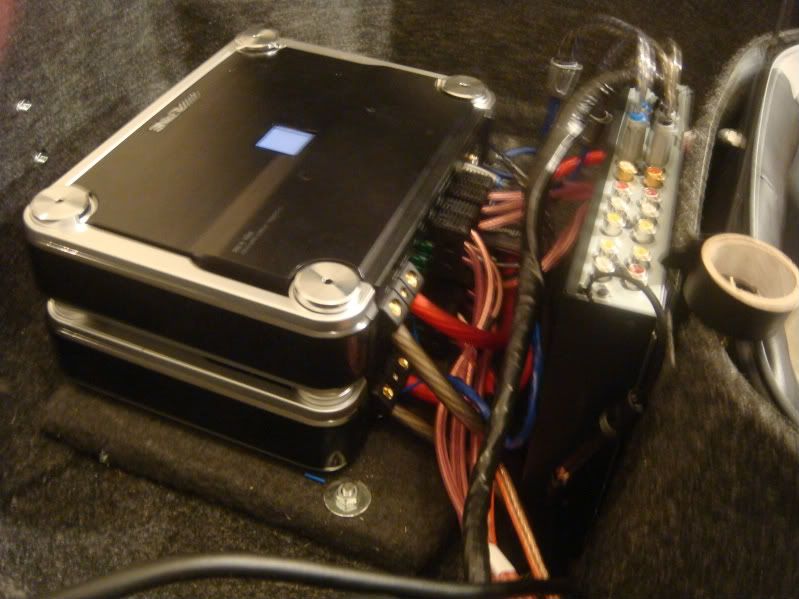
The good thing about the ALPINE amps is: They are made to be stackable. You just use the supplied screws to attach the first one to the 'mounting board', then the supplied machine screws to mount second amp to first amp. WALA !!!
Slide the whole assembly over the threaded rod, and install nuts.
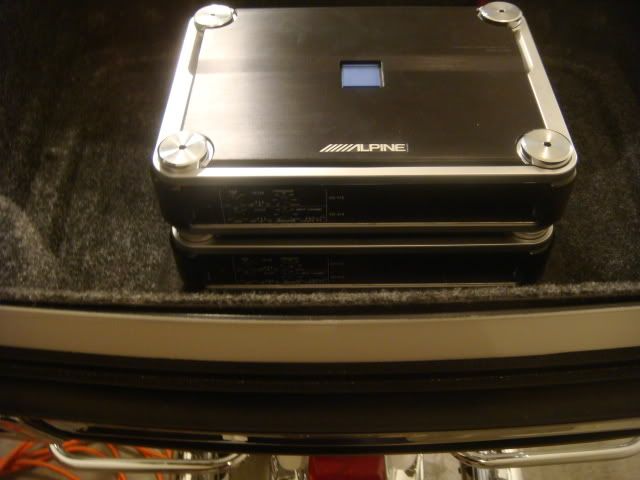
Those are both ground wires in the pic. I went back and changed them both to black.
Notice the felt covered mount under the amps. Doesn't look too bad for a MORON.
I tried to run the main 'brain' harness and speaker wires under the long black cradle under the tank. However, my Ultra has WAY too many wires under there. I just zip tied the wires to the frame, cut off the excess on the zip tie, and rotated the 'knot' part under the frame.
I ran these wires to the back of the bike, and just let them hang, until I knew what I would do with them.
Next, I worked on the ALPINE PDX 4.150 amp install, since I was getting stroked on the delivery of my 6 X 9's.
I was originally gonna put one amp in each hardbag,( along with 2 of the 6 X 9's ) but I had a brainstorm to put them in the tour pack.
I had lots of opinions on what size wire to use for the power and ground. Once again, I went for the over-do it method !! Do it once, and do it right. I went with the 4 gauge.
I went to Best Buy, and bought some 4 gauge MONSTER amp install kits, with gold plated fuse holders. I also bought a KICKER gold plated distribution block, that let me run both of my 4 gauge power wires to it, then just one 4 gauge cable to the battery, via the gold plated fuse holder..
Here is a pic from their website.
After I decided to mount the amps in the tour pack, I had to figure out how. Remember, I'm stoopid. I took out the fitted felt liner, and it looked like this, mounted on a big flat steel plate. So I figured since HD uses this spot for a ground, so could I !!
There are 4 bolts that hold the tour pack on. I took out the two front bolts, and cut some threaded rod.
I put the locknuts on the bottom where it mounts, slipped the eyelets of my ground cable over top, then put nuts
on to hold it all back in place. Then I drilled 2 holes in the form fitted felt tour pack liner, to allow my ground wires out. The liner has 2 raised "runners" where the bolts are, so I drilled as far forward on those as I could.
Install the liner back in the tour pack.
Next, I went to Home Depot and bought a piece of OSB board, ( pressboard), a half inch thick. I used my amp as a template, and drew it's diameter on the wood. I cut the wood by hand with my saber saw, ( if that's what it's called).
I drilled 2 holes in my board, to match the threaded rod. Then I went to WalMart, and bought a piece of felt in the fabric department. I also bought a $ 4 glue gun. I used the felt to cover the wood mount for the amps, and glued the felt in place.
Since it's the same size as the amps, and won't be too noticable, .....so it doesn't have to be perfect. You'll see it in the pics UNDER the amps.
The good thing about the ALPINE amps is: They are made to be stackable. You just use the supplied screws to attach the first one to the 'mounting board', then the supplied machine screws to mount second amp to first amp. WALA !!!
Slide the whole assembly over the threaded rod, and install nuts.
Those are both ground wires in the pic. I went back and changed them both to black.
Notice the felt covered mount under the amps. Doesn't look too bad for a MORON.
Last edited by GLACIERPEARL; 09-28-2009 at 08:08 AM.
#5
09-27-2009, 09:10 PM
So far, we have the head unit installed, front speakers, and amps.
Now we need to get power to the amps !!
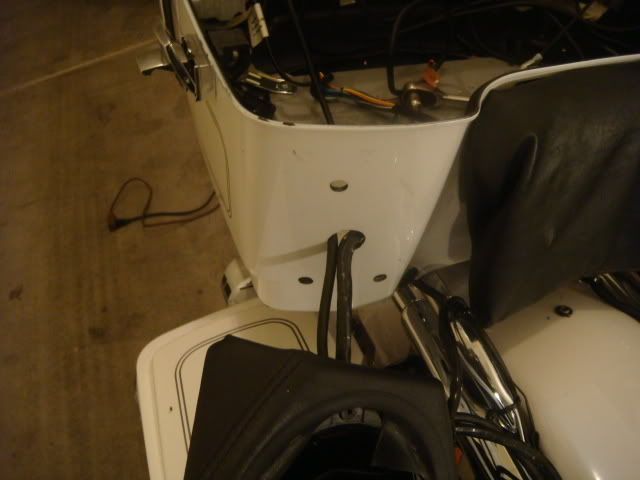
It's REALLY slick how the rear speaker pods work on the ULTRA. They have an opening where wires have to go in for the speakers and such. The openings are kinda hidden behind the seat.
So, I get this brainstorm. I can run all my wires that I need to get to the tour pack, through the openings in the speaker pods. Then, I drill 2 holes in the tour pack, directly behind the pods, so they can't be seen !! ( One in a while I get a good idea !!) Then I'll just pull my wires into the tour pack.
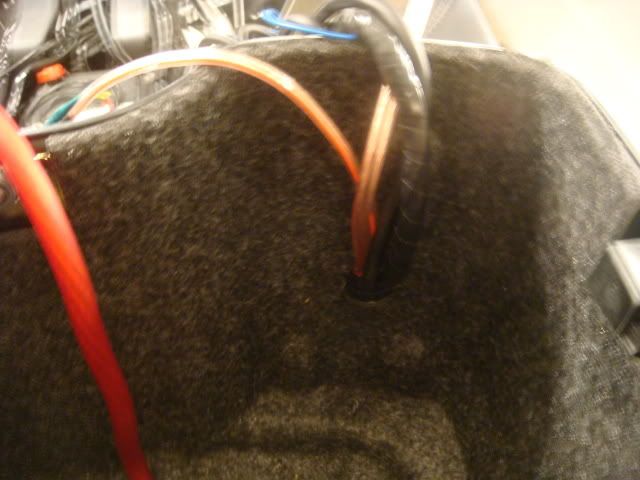
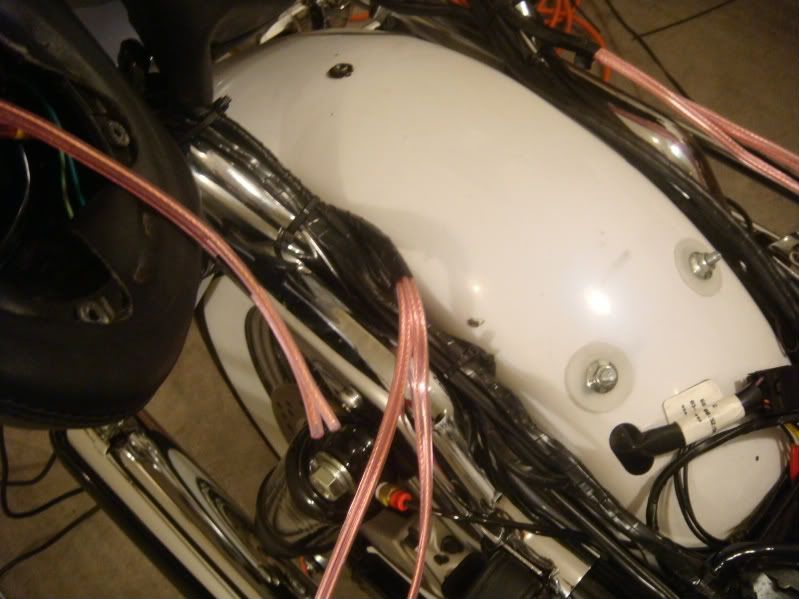
We need to get one 4 guage power wire, 4 wires from front speakers, and 8 wires from rear speakers,
4 wires from rear seat pods, along with the main data cable for the brain,...................all through these 2 holes.
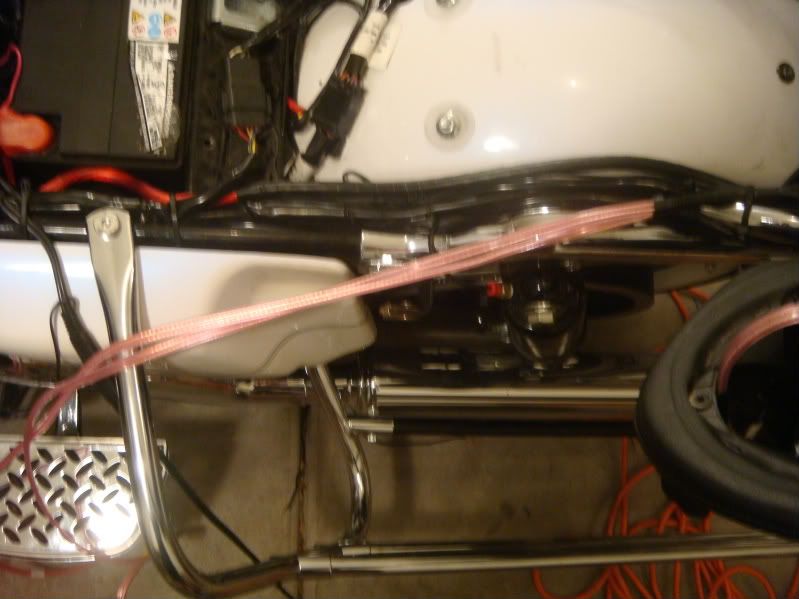
The 4 guage power cable, and the speaker wires from the same side saddlebag & seat pod , went through the left, ( drivers) side whole, since battery is close, and the data cable, front speakers and right, (passengers) side hardbag and seat pod speaker wires through right side. It was tight, but worked AWESOME !!
All wires were either loomed or taped to look as good as possible.

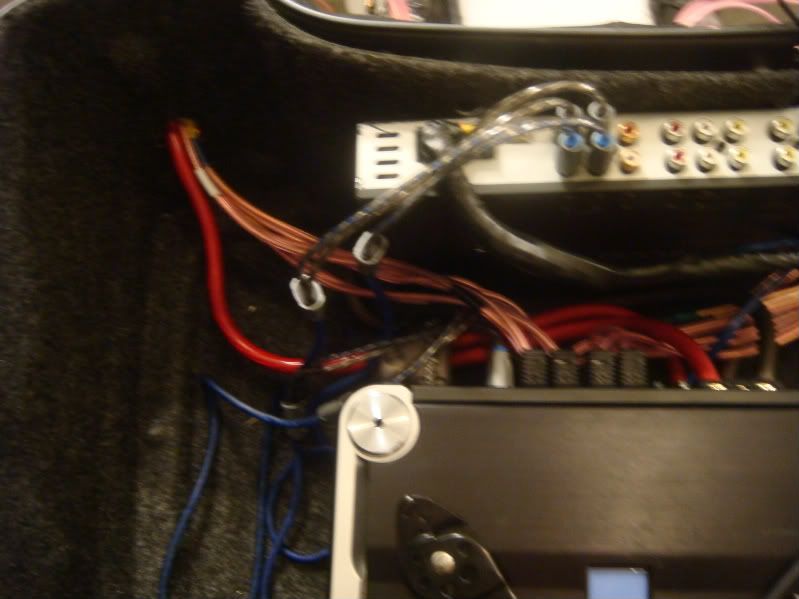
Now, just throw the "brain unit" in the tour pack, and hook up the wires. the RCA wires just go from the brain to the amps, so I found some 'twisted' expensive MONSTER RCA cables that were very short !!
I also need to find the blue "remote" wire from the aftermarket's harness, and solder 2 wires to it. One wire goes to each 'remote' location. This is where the amps get their command to power up from the head unit.
I just used velcro to put the brain unit against the front of the tour pack. If it doesn't hold good, I use the install bracket, and have to drill 2 holes that will be under the passenger backrest. Don't want to have to do this.
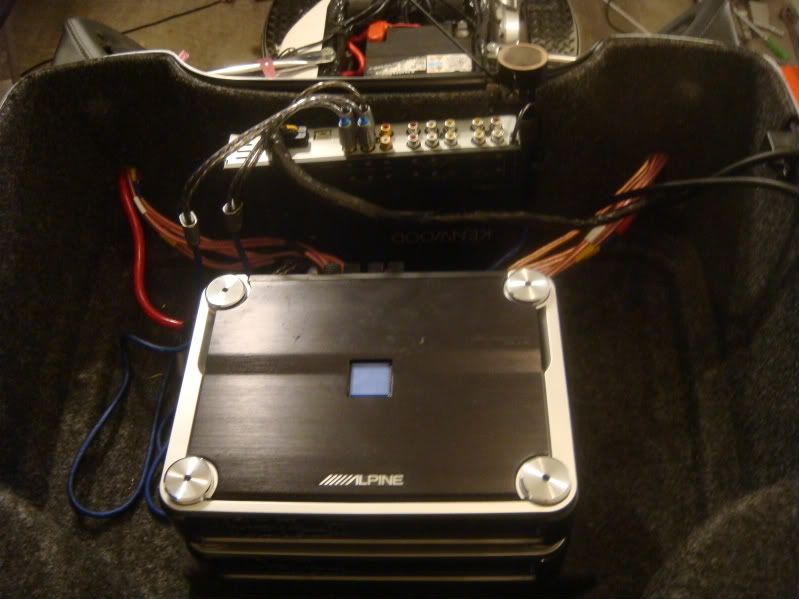
A few pics of the amps and brain installed with all wiring and cables.

Now we need to get power to the amps !!
It's REALLY slick how the rear speaker pods work on the ULTRA. They have an opening where wires have to go in for the speakers and such. The openings are kinda hidden behind the seat.
So, I get this brainstorm. I can run all my wires that I need to get to the tour pack, through the openings in the speaker pods. Then, I drill 2 holes in the tour pack, directly behind the pods, so they can't be seen !! ( One in a while I get a good idea !!) Then I'll just pull my wires into the tour pack.
We need to get one 4 guage power wire, 4 wires from front speakers, and 8 wires from rear speakers,
4 wires from rear seat pods, along with the main data cable for the brain,...................all through these 2 holes.
The 4 guage power cable, and the speaker wires from the same side saddlebag & seat pod , went through the left, ( drivers) side whole, since battery is close, and the data cable, front speakers and right, (passengers) side hardbag and seat pod speaker wires through right side. It was tight, but worked AWESOME !!
All wires were either loomed or taped to look as good as possible.
Now, just throw the "brain unit" in the tour pack, and hook up the wires. the RCA wires just go from the brain to the amps, so I found some 'twisted' expensive MONSTER RCA cables that were very short !!
I also need to find the blue "remote" wire from the aftermarket's harness, and solder 2 wires to it. One wire goes to each 'remote' location. This is where the amps get their command to power up from the head unit.
I just used velcro to put the brain unit against the front of the tour pack. If it doesn't hold good, I use the install bracket, and have to drill 2 holes that will be under the passenger backrest. Don't want to have to do this.
A few pics of the amps and brain installed with all wiring and cables.
Last edited by GLACIERPEARL; 09-27-2009 at 11:56 PM.
#6
09-27-2009, 09:10 PM
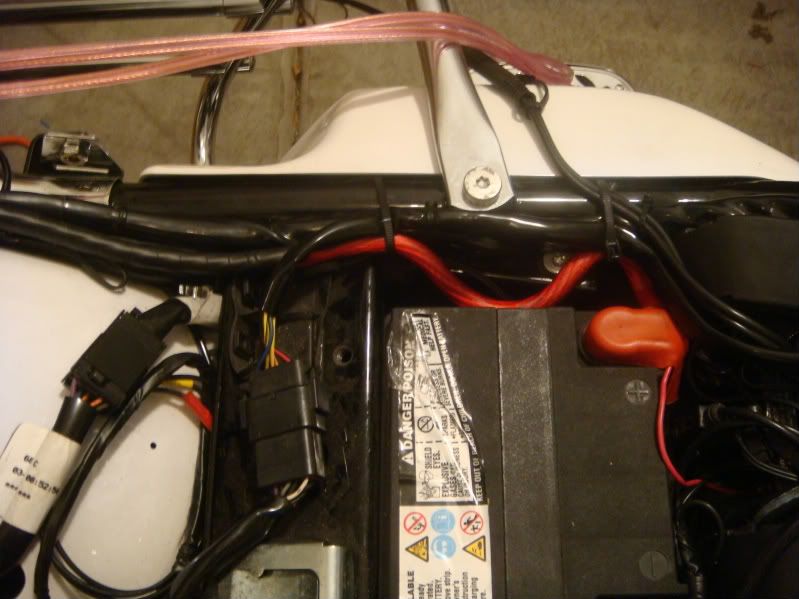
I installed the junction block inside the tour pack, and mounted it to the felt covered wood that we mounted the amps too.
So, I have a 4 gauge power wire coming out of each amp and going into the junction block. the single 4 gauge wire leaves the tour pack through the hole we drilled , that goes into the speaker pod. Inside the speaker pod, I installed the gold plated 4 gauge fuse holder. After the fuse holder, the wire comes out of the rear speaker pod, and follows the frame to the battery.
Now that we have a head unit installed , amps installed , all wiring run and buttoned up, it's time for rear speakers !!!
Last edited by GLACIERPEARL; 09-28-2009 at 08:09 AM.
#7
09-27-2009, 09:12 PM
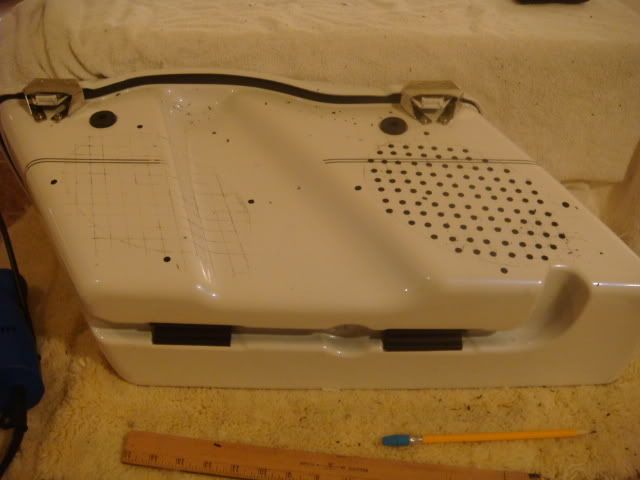
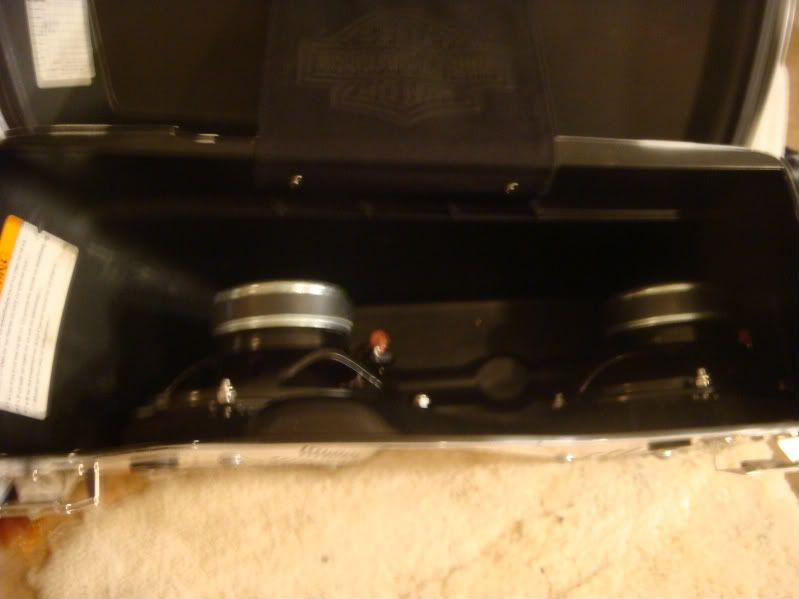
This part was the most intimidating !! I knew that 2 sets of 6 X 9's in the hard bags would be really pushing my abilities.
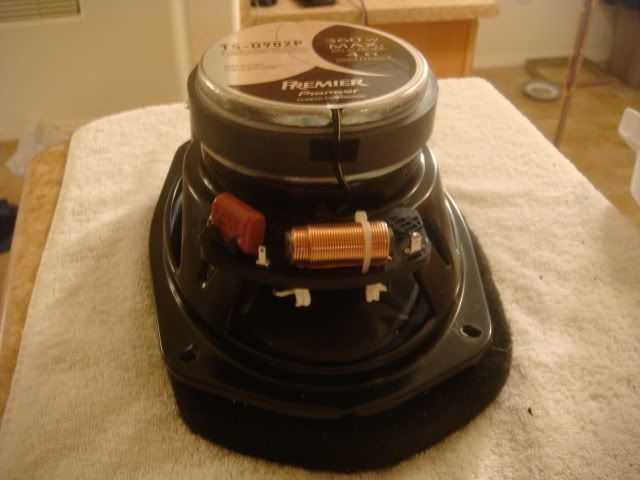
The magnets in these things are bigger than my head !!
I tried to find 1/2 " spacers for the 6 X 9's, but nobody had any in stock. So , I called a local hi-fi shop, and their installer said to bring in my bike, and he could make me a pair.
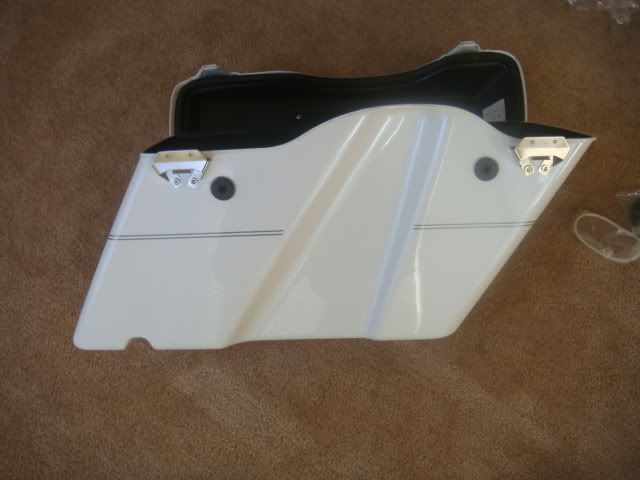
It's a VERY tricky spacer, because the front speaker overlaps the shock channel in the hard bag.
Anyhow, these are what I came home with !
Notice how the front spacers are tapered to fit around the shock channel. If Firecap or Aaron Oregon stocked these babies, it woul been really nice !!
Now I had to go home and drill holes in my hard bags !! YIKES !!
I stopped at the Harley dealership on the way home, and bought the felt liners for the hard bags. However, the way I drilled my bags, I couldn't get the liners to fit. I later found out that most guys cut the bottoms off. Well, I didn't spent $150 to cut the bottoms off !! i'll take it to an upolstery shop when I get time.
Anyhow , on to the hole drilling !!
First I set the speakers where I wanted them, and realized my drill woldn't fit inside the bag.
Off to Harbor Freight to by a cheap 90 degree drill. A whopping $29 !!
Once I put the speakers where I wanted them , I drilled the 4 holes in the bag to hold the speakers. That way I knew where to drill my 'sound' holes.
I laid my hard bags on the counter and drew agrid pattern on them with, ( I believe), 1 inch squares. I tried to get my bit centered every time, but..................each bag has over 100 holes.
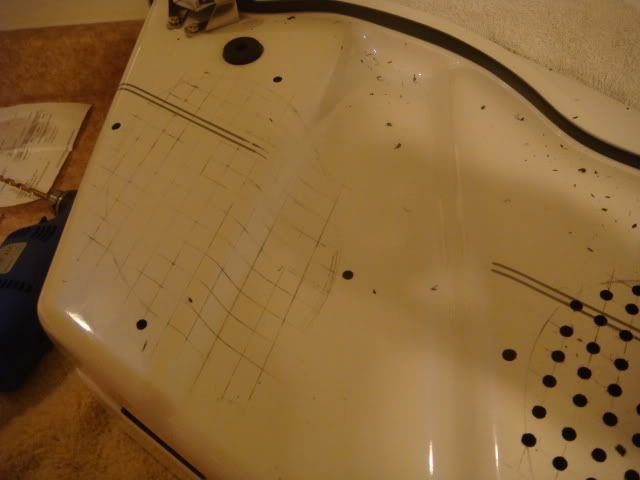
I was told to use a 1/8 inch drill bit, but I accidently used a 1/4 " Once I drilled the first hole, it was to late to turn back.
It took about 45 minutes for each speaker, about 3 hours total !!
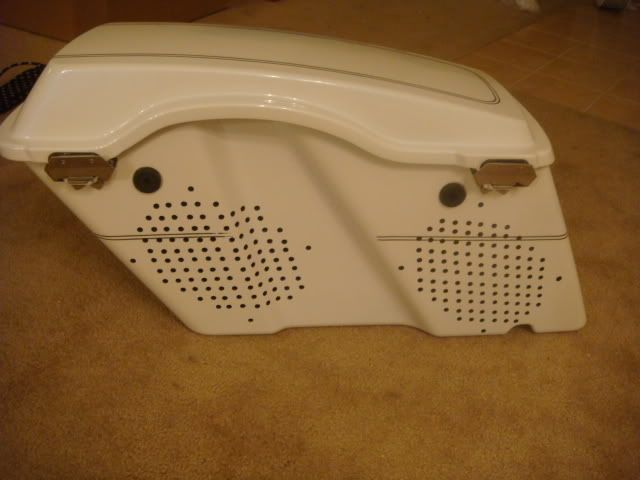
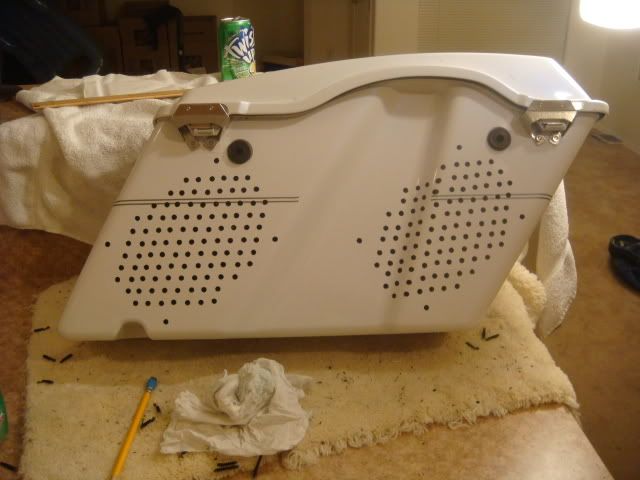
Not exactly perfect, but they are hard to see when the bags are on !! Here they are with
stainless steel mounting screws for the speakers.
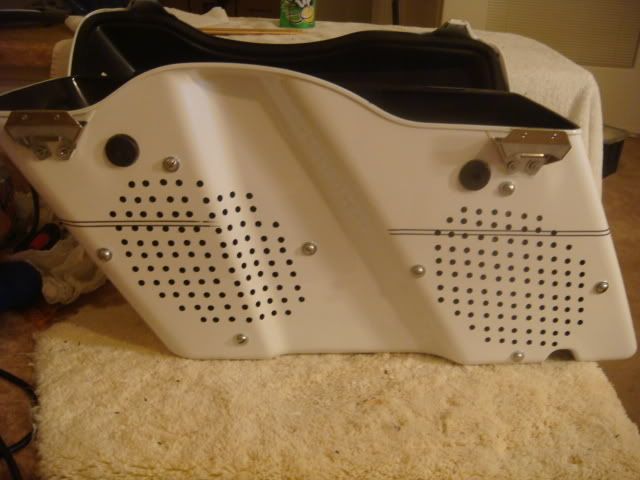
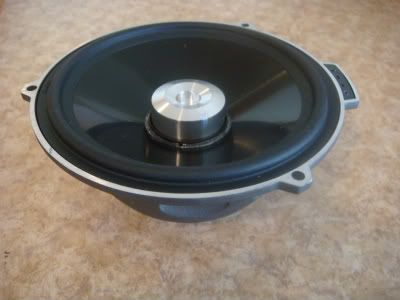
Here is the finished hardbag with 2 of the 6X9 speakers installed !! FINALLY !!!! Not bad for a MORON !!
The magnets in these things are bigger than my head !!
I tried to find 1/2 " spacers for the 6 X 9's, but nobody had any in stock. So , I called a local hi-fi shop, and their installer said to bring in my bike, and he could make me a pair.
It's a VERY tricky spacer, because the front speaker overlaps the shock channel in the hard bag.
Anyhow, these are what I came home with !
Notice how the front spacers are tapered to fit around the shock channel. If Firecap or Aaron Oregon stocked these babies, it woul been really nice !!
Now I had to go home and drill holes in my hard bags !! YIKES !!
I stopped at the Harley dealership on the way home, and bought the felt liners for the hard bags. However, the way I drilled my bags, I couldn't get the liners to fit. I later found out that most guys cut the bottoms off. Well, I didn't spent $150 to cut the bottoms off !! i'll take it to an upolstery shop when I get time.
Anyhow , on to the hole drilling !!
First I set the speakers where I wanted them, and realized my drill woldn't fit inside the bag.
Off to Harbor Freight to by a cheap 90 degree drill. A whopping $29 !!
Once I put the speakers where I wanted them , I drilled the 4 holes in the bag to hold the speakers. That way I knew where to drill my 'sound' holes.
I laid my hard bags on the counter and drew agrid pattern on them with, ( I believe), 1 inch squares. I tried to get my bit centered every time, but..................each bag has over 100 holes.
I was told to use a 1/8 inch drill bit, but I accidently used a 1/4 " Once I drilled the first hole, it was to late to turn back.
It took about 45 minutes for each speaker, about 3 hours total !!
Not exactly perfect, but they are hard to see when the bags are on !! Here they are with
stainless steel mounting screws for the speakers.
Here is the finished hardbag with 2 of the 6X9 speakers installed !! FINALLY !!!! Not bad for a MORON !!
Last edited by GLACIERPEARL; 09-28-2009 at 08:11 AM.
Trending Topics
#8
09-27-2009, 09:12 PM
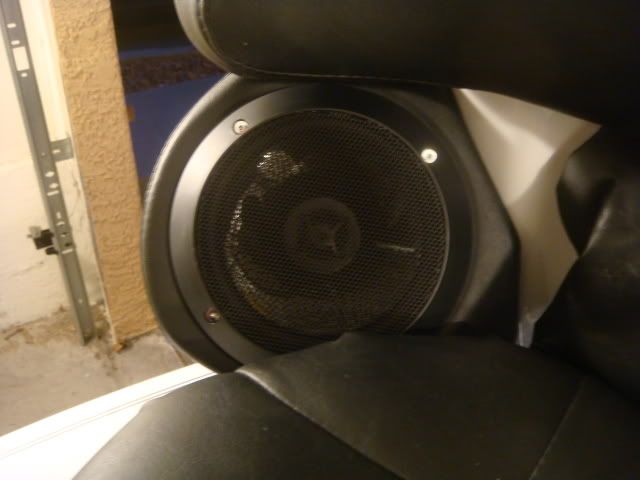
Now, all we gotta do is replace the rear seat pods with the ROCKFORD FOSGATE 5 1/4's !!
This is by FAR the easiest part of the whole job !!
Couldn't use my chrome grills that I had on the factory speakers, but..............oh well !!
They look OK. Kinda liked my chrome grills though !
This is by FAR the easiest part of the whole job !!
Couldn't use my chrome grills that I had on the factory speakers, but..............oh well !!
They look OK. Kinda liked my chrome grills though !
Last edited by GLACIERPEARL; 09-28-2009 at 12:21 AM.
#9
09-27-2009, 09:12 PM
#10
09-27-2009, 09:13 PM
This system is the cleanest sounding system that I have EVER heard. It has 1200 watts of undistorted sound.
Definately a show stopper. I installed this system in my bike when I lived in Vegas. A few guys had decent systems there, but I just moved back to Ohio last month.
I went to the local Quaker Steak & Lube bike nite in Ohio , and you woulda thought that I rode in on a space ship. A real show stopper !! I usually play some hard concert music DVD ( AC/DC, Drowning Pool, 3 Days Grace, etc, ), with the screen up, as people are walking around checking out the bikes. It's a lot of fun.
Last edited by GLACIERPEARL; 09-28-2009 at 12:28 AM.