
BT Install Completed
#1
 03-05-2016, 02:45 PM

Warning... Long post.
Well I completed my BT install today. Only a few minor snags, but overall a fairly straight forward install. Here's my setup.
Amp = Biketronics 4180.14EG
Front Speakers = Biketronics Titan II 7.1"
Rear Speakers = Biketronics Titan II 6.5" (with speaker adapters from V-Twin Audio)
Biketronics BT355 Line Levelers
Biketronics Breakout Harness
I did the whole thing over the span of a week and probably spent about 8 hours total, which for a audio newbie I didn't think was half bad. The plug and play nature of the BT package helped a lot with that. The first day I spent about 3 hours on the tear down.
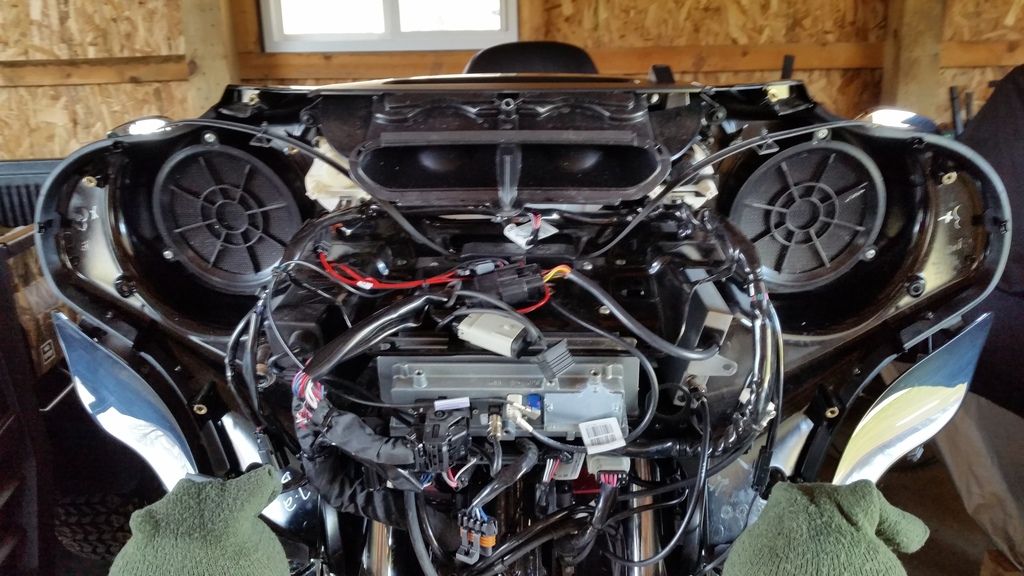
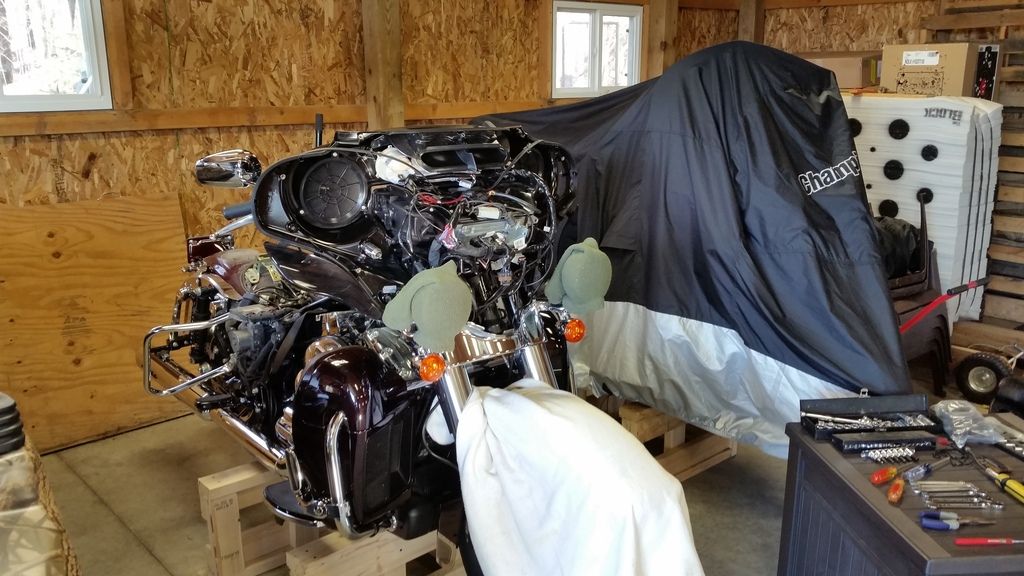
Those damn fairing pods were a bitch, just like everyone said they would be. Why the hell did HD need to put 8 screws in that stupid plastic pod? If they would have put a half decent speaker in there they wouldn't have needed those POS pods. Anyway, only one minor knuckle buster and a half dozen cuss words later and in the trash they went... good riddance. (If you're using the BT breakout harness don't forget to retain the speaker harness from the old speaker pods.) Called it quits after that on Day 1.
The next day I spent some time just laying out all the BT parts on the bench and making sure I knew how everything plugged together. It wasn't until then that I realized that BT forgot to include the amp mounting plate in my package... uugghh. Called them up and they had one shipped out the same day (received in 2 days - west coast to east coast). Very satisfied with their responsiveness.
While I was on the phone with BT I had a couple questions to confirm how everything plugged together and Mike did a great job walking me through everything with it all sitting there in front of me so I could mock it up on the bench. During that time I also realized that the BT477 Titan 6.5 speakers had different sized spade connectors than the ones on my stock speaker harness. Mike said that they used the "European size" spade connectors on those speakers (not sure why) so he also threw in a set of adapters to connect between my stock speaker harness and the BT477 speakers when he shipped the amp plate (these are not included in the original package). Worked perfectly and definitely a better option than connecting the larger female stock spade connector to the smaller male connector on the speaker. It just would not have been a nice snug fit. So watch out for that if you're using the BT477's.
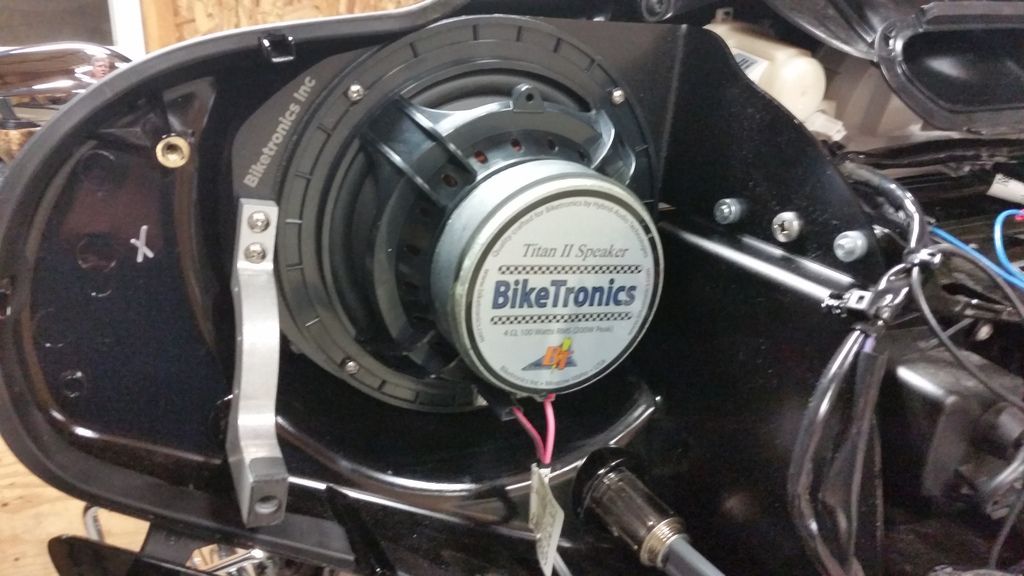
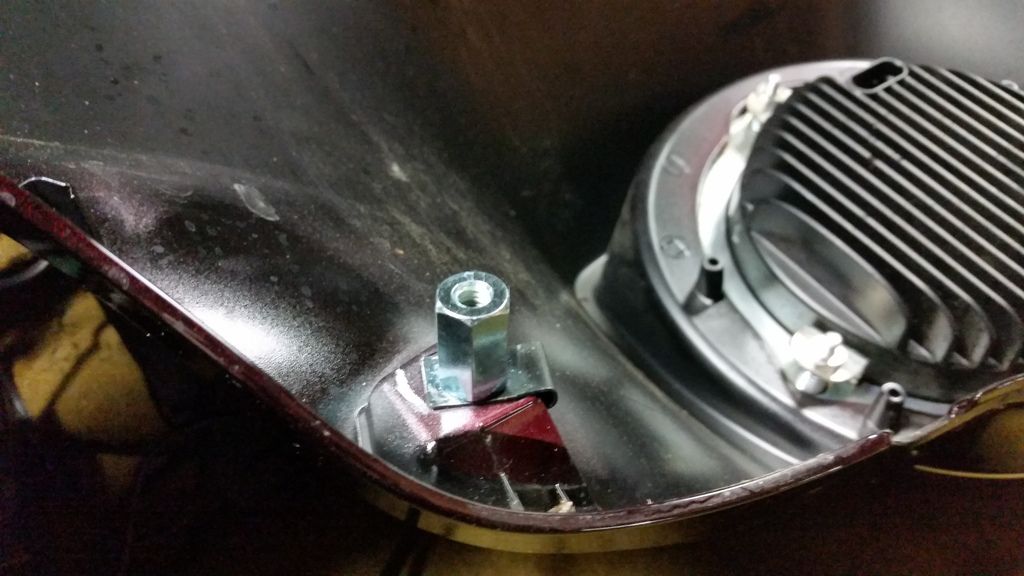
While I was waiting for the amp mounting plate I worked on installing the front and rear speakers. The front speaker mounting brackets are a pretty straight forward swap. Took the advice of Paul and replaced the stock screws with hex head bolts in case I have to remove it later. I'd definitely recommend this. Much easier access to the screw head.

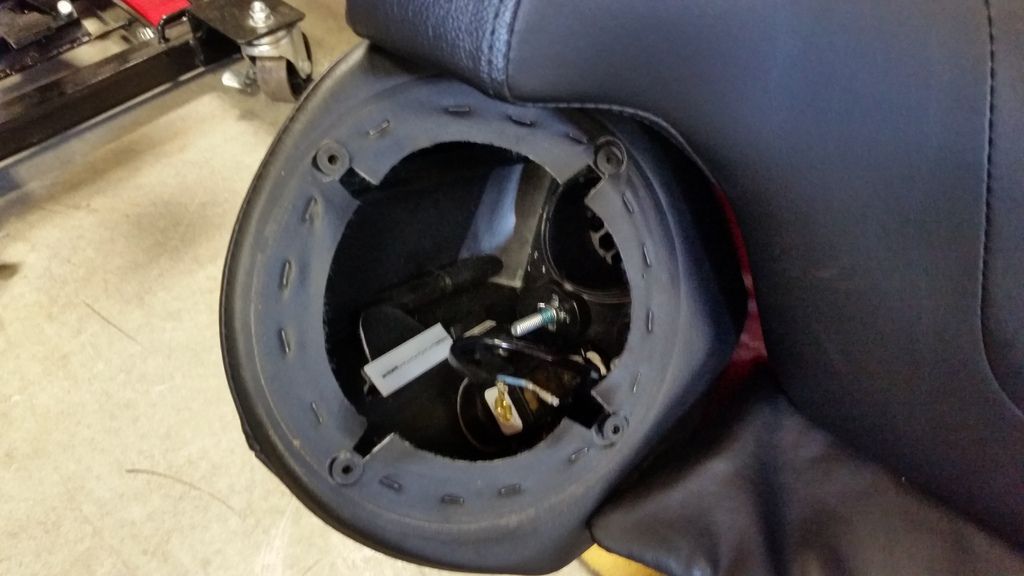
Had some trouble with the V-Twin adapters for the Tourpak also. When I put them on and tried to fit the BT477 speaker, it wouldn't sit flush against the inner ring of the adapter. The lip on the speaker was probably 1/8" from sitting flat in the adapter. This confused me because BT recommended the V-Twin adapters to work with those speakers.

So I emailed V-Twin to ask what was up. This was at about 9pm at night and to my surprise I got a call from their tech support guy about 10 minutes later to help me. I didn't realize it but the adapters are side-specific. The instructions say nothing about this and the only way to tell which side is which is to look at the back of the adapter. They lightly scribed the words "clutch" and "brake" with an arrow to indicate the orientation and which side to install them. The words are barely readable (for my old eyes anyway). I told the guy they needed to update their instructions and it sounded like he had already been through this and agreed. Anyway, great customer service from V-Twin. The guy spent about a half hour on the phone with me even though it was after their normal business hours.
Needless to say, the side swap didn't completely solve the 1/8" gap, but it was definitely better. So I just installed the speakers in the adapters being careful not to bend the lip on the speaker but making sure it was still secure and called it good. I'll work to improve that situation somehow later.
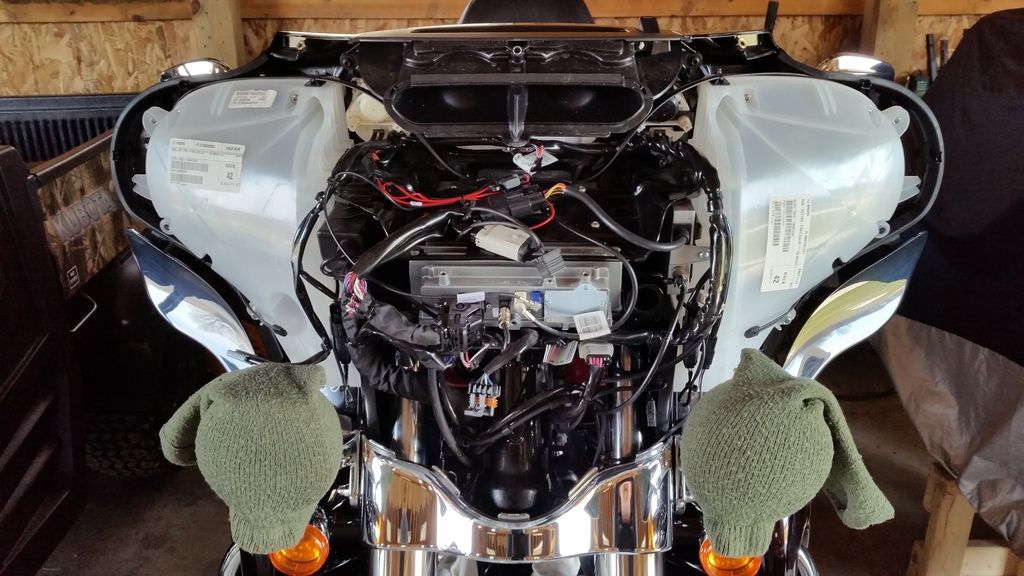
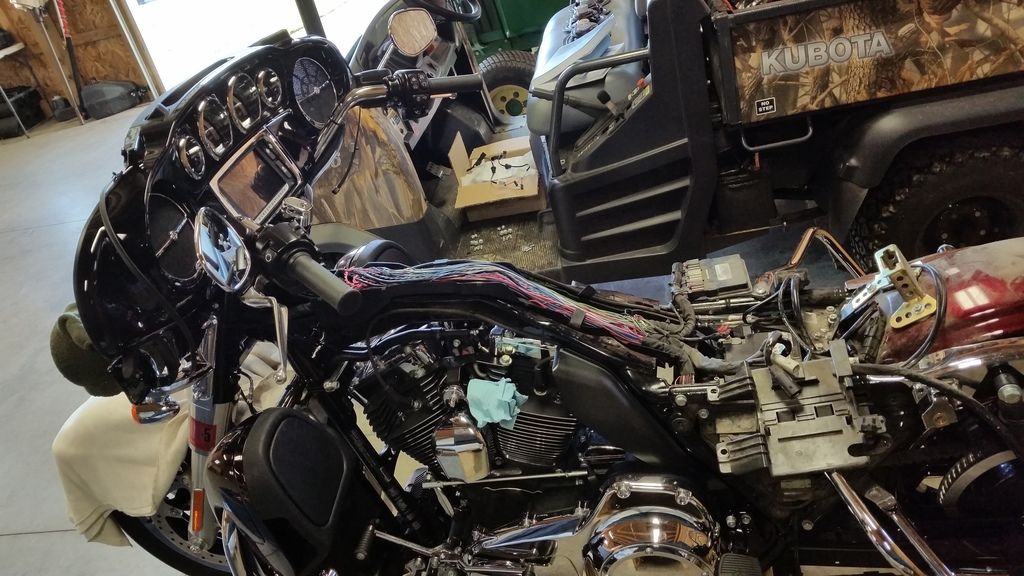
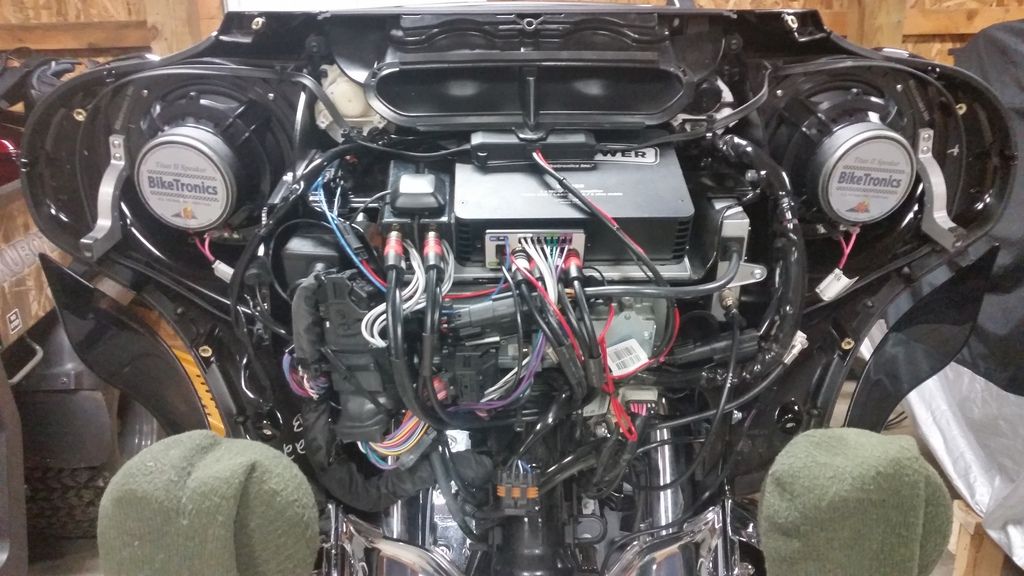
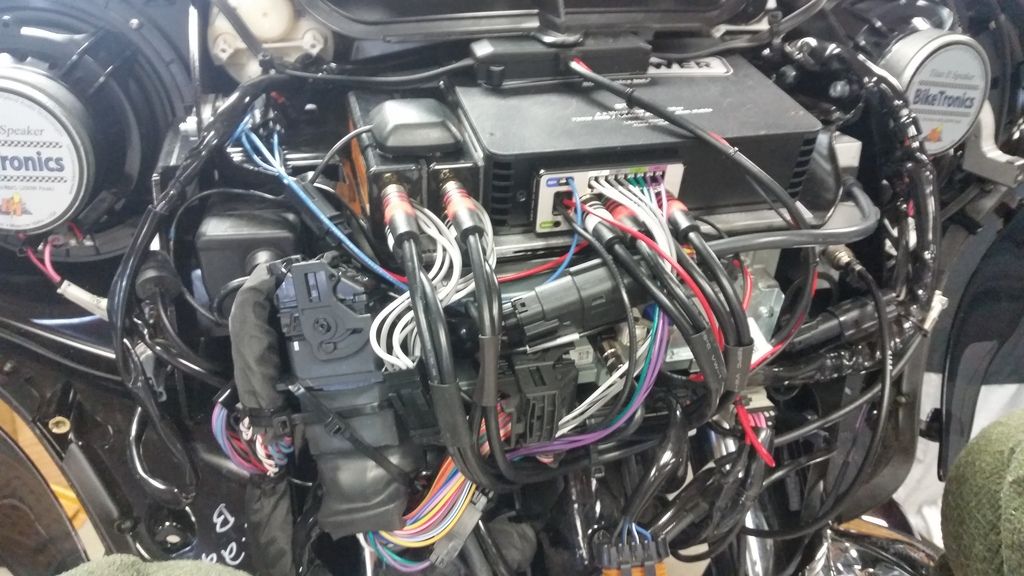
So once I got the amp mount plate from BT I was able to get everything else installed. It's all pretty straight forward and mocking everything up on the bench expedited the install for me. The hardest part of this was buttoning up all the wiring so you can fit the fairing back on. It took me a couple variations to find the best location for everything because that breakout harness is a monster, but it sure makes the install much easier. Here's the configuration I ended up finding fit the best for me. You can see that huge double connector from the breakout harness on the left. I zip tied that thing as tight as I could to the HU mounting plate to pull it in away from the fairing. Line levelers to the left of the amp with the sat antenna on top of them.
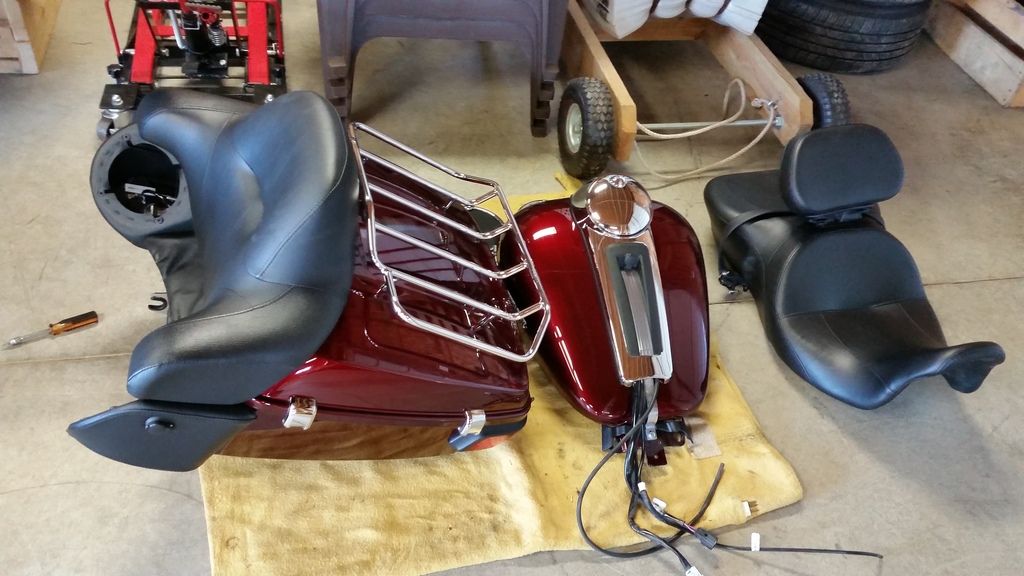
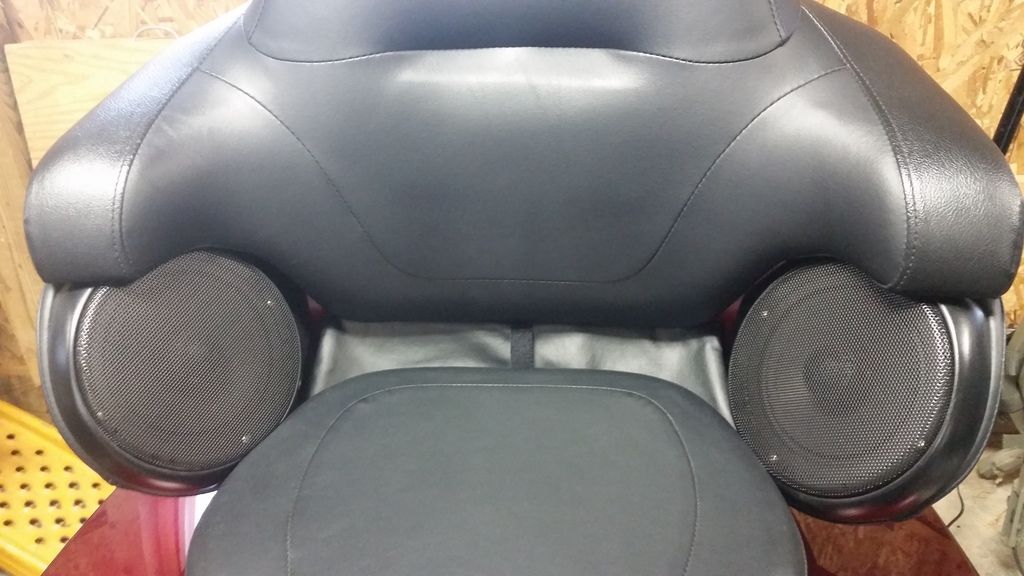
The rear speakers ended up working out pretty well and the V-Twin adapters and grills don't look as bad as I thought they might at first.
I chose to use the ground wire that came with the amp and grounded to the HU mounting screw as per the BT instructions instead of going back to the main ground. I asked BT and they didn't think it was necessary, so I followed their advice (could easily change that later if I have an issue). Also, if you have the hidden FM/AM antenna like I do, there's plenty of room on top of the amp to mount the base unit and the amp enable wire that comes with the 4180 has a small harness that allows you to plug the hidden antenna connector inline with the amp enable plug from the amp.
I would recommend using the standoffs in the fairing also. Makes it easier to reinstall and less chance of crushing anything. The standoffs come with two shorter fairing screws to replace the longer stock screws so make sure you use them. Otherwise you'll be wondering why the fairing doesn't snug up at the bottom.
So I only ended up with one busted knuckle and a minor scuff on my tank during the reinstall, but a little Scratch X took care of that easy enough. Overall the install went fairly smooth and only some minor issues that weren't hard to rectify. I will say that one knock I have against BT is that their instructions for the breakout harness are non-existent. You basically either have to figure out how it all hooks up yourself or call them and have them walk you through it, but you better have it all laid out in front of you when you call.
As for the sound... I will say that these BT speakers lack the low end bass that I like. So it wouldn't surprise me if I do a speaker swap sometime in the future. But my primary goal was to replace the garbage stock Boom crap with something the wife and I could actually hear well at highway speeds, and this setup will fit that bill nicely. This bad boy is LOUD, with more to give than I can handle!!! Like so many others here, this was just the first step in my audio journey. I'm sure a speaker upgrade is in my future at some point but I'll enjoy this for now.
Bottom line... I'm very satisfied with the BT solution and would highly recommend it to anyone looking for a good plug and play option from a company that provides great customer service.
Finally... Thanks to all the folks on this forum. The great posts and advice here helped with my install tremendously. I follow a number of forums on HDForums and this Audio Systems forum is by far the most informative, helpful and especially non-judgmental. Keep it up guys. Great work!!!!
Well I completed my BT install today. Only a few minor snags, but overall a fairly straight forward install. Here's my setup.
Amp = Biketronics 4180.14EG
Front Speakers = Biketronics Titan II 7.1"
Rear Speakers = Biketronics Titan II 6.5" (with speaker adapters from V-Twin Audio)
Biketronics BT355 Line Levelers
Biketronics Breakout Harness
I did the whole thing over the span of a week and probably spent about 8 hours total, which for a audio newbie I didn't think was half bad. The plug and play nature of the BT package helped a lot with that. The first day I spent about 3 hours on the tear down.


Those damn fairing pods were a bitch, just like everyone said they would be. Why the hell did HD need to put 8 screws in that stupid plastic pod? If they would have put a half decent speaker in there they wouldn't have needed those POS pods. Anyway, only one minor knuckle buster and a half dozen cuss words later and in the trash they went... good riddance. (If you're using the BT breakout harness don't forget to retain the speaker harness from the old speaker pods.) Called it quits after that on Day 1.
The next day I spent some time just laying out all the BT parts on the bench and making sure I knew how everything plugged together. It wasn't until then that I realized that BT forgot to include the amp mounting plate in my package... uugghh. Called them up and they had one shipped out the same day (received in 2 days - west coast to east coast). Very satisfied with their responsiveness.
While I was on the phone with BT I had a couple questions to confirm how everything plugged together and Mike did a great job walking me through everything with it all sitting there in front of me so I could mock it up on the bench. During that time I also realized that the BT477 Titan 6.5 speakers had different sized spade connectors than the ones on my stock speaker harness. Mike said that they used the "European size" spade connectors on those speakers (not sure why) so he also threw in a set of adapters to connect between my stock speaker harness and the BT477 speakers when he shipped the amp plate (these are not included in the original package). Worked perfectly and definitely a better option than connecting the larger female stock spade connector to the smaller male connector on the speaker. It just would not have been a nice snug fit. So watch out for that if you're using the BT477's.
While I was waiting for the amp mounting plate I worked on installing the front and rear speakers. The front speaker mounting brackets are a pretty straight forward swap. Took the advice of Paul and replaced the stock screws with hex head bolts in case I have to remove it later. I'd definitely recommend this. Much easier access to the screw head.


Had some trouble with the V-Twin adapters for the Tourpak also. When I put them on and tried to fit the BT477 speaker, it wouldn't sit flush against the inner ring of the adapter. The lip on the speaker was probably 1/8" from sitting flat in the adapter. This confused me because BT recommended the V-Twin adapters to work with those speakers.

So I emailed V-Twin to ask what was up. This was at about 9pm at night and to my surprise I got a call from their tech support guy about 10 minutes later to help me. I didn't realize it but the adapters are side-specific. The instructions say nothing about this and the only way to tell which side is which is to look at the back of the adapter. They lightly scribed the words "clutch" and "brake" with an arrow to indicate the orientation and which side to install them. The words are barely readable (for my old eyes anyway). I told the guy they needed to update their instructions and it sounded like he had already been through this and agreed. Anyway, great customer service from V-Twin. The guy spent about a half hour on the phone with me even though it was after their normal business hours.
Needless to say, the side swap didn't completely solve the 1/8" gap, but it was definitely better. So I just installed the speakers in the adapters being careful not to bend the lip on the speaker but making sure it was still secure and called it good. I'll work to improve that situation somehow later.
So once I got the amp mount plate from BT I was able to get everything else installed. It's all pretty straight forward and mocking everything up on the bench expedited the install for me. The hardest part of this was buttoning up all the wiring so you can fit the fairing back on. It took me a couple variations to find the best location for everything because that breakout harness is a monster, but it sure makes the install much easier. Here's the configuration I ended up finding fit the best for me. You can see that huge double connector from the breakout harness on the left. I zip tied that thing as tight as I could to the HU mounting plate to pull it in away from the fairing. Line levelers to the left of the amp with the sat antenna on top of them.


The rear speakers ended up working out pretty well and the V-Twin adapters and grills don't look as bad as I thought they might at first.

I chose to use the ground wire that came with the amp and grounded to the HU mounting screw as per the BT instructions instead of going back to the main ground. I asked BT and they didn't think it was necessary, so I followed their advice (could easily change that later if I have an issue). Also, if you have the hidden FM/AM antenna like I do, there's plenty of room on top of the amp to mount the base unit and the amp enable wire that comes with the 4180 has a small harness that allows you to plug the hidden antenna connector inline with the amp enable plug from the amp.
I would recommend using the standoffs in the fairing also. Makes it easier to reinstall and less chance of crushing anything. The standoffs come with two shorter fairing screws to replace the longer stock screws so make sure you use them. Otherwise you'll be wondering why the fairing doesn't snug up at the bottom.

So I only ended up with one busted knuckle and a minor scuff on my tank during the reinstall, but a little Scratch X took care of that easy enough. Overall the install went fairly smooth and only some minor issues that weren't hard to rectify. I will say that one knock I have against BT is that their instructions for the breakout harness are non-existent. You basically either have to figure out how it all hooks up yourself or call them and have them walk you through it, but you better have it all laid out in front of you when you call.
As for the sound... I will say that these BT speakers lack the low end bass that I like. So it wouldn't surprise me if I do a speaker swap sometime in the future. But my primary goal was to replace the garbage stock Boom crap with something the wife and I could actually hear well at highway speeds, and this setup will fit that bill nicely. This bad boy is LOUD, with more to give than I can handle!!! Like so many others here, this was just the first step in my audio journey. I'm sure a speaker upgrade is in my future at some point but I'll enjoy this for now.
Bottom line... I'm very satisfied with the BT solution and would highly recommend it to anyone looking for a good plug and play option from a company that provides great customer service.
Finally... Thanks to all the folks on this forum. The great posts and advice here helped with my install tremendously. I follow a number of forums on HDForums and this Audio Systems forum is by far the most informative, helpful and especially non-judgmental. Keep it up guys. Great work!!!!
Last edited by skibum0607; 03-05-2016 at 05:26 PM.
#2
03-05-2016, 04:41 PM

Warning... Long post.
Well I completed my BT install today. Only a few minor snags, but overall a fairly straight forward install. Here's my setup.
Amp = Biketronics 4180.14EG
Front Speakers = Biketronics Titan II 7.1"
Rear Speakers = Biketronics Titan II 6.5" (with speaker adapters from V-Twin Audio)
Biketronics BT355 Line Levelers
Biketronics Breakout Harness
I did the whole thing over the span of a week and probably spent about 8 hours total, which for a audio newbie I didn't think was half bad. The plug and play nature of the BT package helped a lot with that. The first day I spent about 3 hours on the tear down.
Those damn fairing pods were a bitch, just like everyone said they would be. Why the hell did HD need to put 8 screws in that stupid plastic pod? If they would have put a half decent speaker in there they wouldn't have needed those POS pods. Anyway, only one minor knuckle buster and a half dozen cuss words later and in the trash they went... good riddance. (If you're using the BT breakout harness don't forget to retain the speaker harness from the old speaker pods.) Called it quits after that on Day 1.
The next day I spent some time just laying out all the BT parts on the bench and making sure I knew how everything plugged together. It wasn't until then that I realized that BT forgot to include the amp mounting plate in my package... uugghh. Called them up and they had one shipped out the same day (received in 2 days - west coast to east coast). Very satisfied with their responsiveness.
While I was on the phone I had a couple questions to confirm how everything plugged together and Mike did a great job walking me through everything with it all sitting there in front of me so I could mock it up on the bench. During that time I also realized that the BT477 Titan 6.5 speakers had different sized spade connectors than the ones on my stock speaker harness. Mike said that they used the "European size" spade connectors on those speakers (not sure why) so he also threw in a set of adapters to connect between my stock speaker harness and the BT477 speakers when he shipped the amp plate (these are not included in the original package). Worked perfectly and definitely a better option than connecting the larger female stock spade connector to the smaller male connector on the speaker. It just would not have been a nice snug fit. So watch out for that if you're using the BT477's.
While I was waiting for the amp mounting plate I worked on installing the front and rear speakers. The front speaker mounting brackets are a pretty straight forward swap. Took the advice of Paul and replaced the stock screws with hex head bolts in case I have to remove it later. I'd definitely recommend this. Much easier access to the screw head.
Had some trouble with the V-Twin adapters for the Tourpak also. When I put them on and tried to fit the BT477 speaker, it wouldn't sit flush against the inner ring of the adapter. The lip on the speaker was probably 1/8" from sitting flat in the adapter. This confused me because BT recommended the V-Twin adapters to work with those speakers.
So I emailed V-Twin to ask what was up. This was at about 9pm at night and to my surprise I got a call from their tech support guy about 10 minutes later to help me. I didn't realize it but the adapters are side-specific. The instructions say nothing about this and the only way to tell which side is which is to look at the back of the adapter. They lightly scribed the words "clutch" and "brake" with an arrow to indicate the orientation and which side to install them. The words are barely readable (for my old eyes anyway). I told the guy they needed to update their instructions and it sounded like he had already been through this and agreed. Anyway, great customer service from V-Twin. The guy spent about a half hour on the phone with me even though it was after their normal business hours.
Needless to say, the side swap didn't completely solve the 1/8" gap, but it was definitely better. So I just installed the speakers in the adapters being careful not to bend the lip on the speaker but making sure it was still secure and called it good. I'll work to improve that situation somehow later.
So once I got the amp mount plate from BT I was able to get everything else installed. It's all pretty straight forward and mocking everything up on the bench expedited the install for me. The hardest part of this was buttoning up all the wiring so you can fit the fairing back on. It took me a couple variations to find the best location for everything because that breakout harness is a monster, but it sure makes the install much easier. Here's the configuration I ended up finding fit the best for me. You can see that huge double connector from the breakout harness on the left. I zip tied that thing as tight as I could to the HU mounting plate to pull it in away from the fairing. Line levelers to the left of the amp with the sat antenna on top of them.
The rear speakers ended up working out pretty well and the V-Twin adapters and grills don't look as bad as I thought they might at first.
I chose to use the ground wire that came with the amp and grounded to the HU mounting screw as per the BT instructions instead of going back to the main ground. I asked BT and they didn't think it was necessary, so I followed their advice (could easily change that later if I have an issue). Also, if you have the hidden FM/AM antenna like I do, there's plenty of room on top of the amp to mount the base unit and the amp enable wire that comes with the 4180 has a small harness that allows you to plug the hidden antenna connector inline with the amp enable plug from the amp.
I would recommend using the standoffs in the fairing also. Makes it easier to reinstall and less chance of crushing anything. The standoffs come with two shorter fairing screws to replace the longer stock screws so make sure you use them. Otherwise you'll be wondering why the fairing doesn't snug up at the bottom.
So I only ended up with one busted knuckle and a minor scuff on my tank during the reinstall, but a little Scratch X took care of that easy enough. Overall the install went fairly smooth and only some minor issues that weren't hard to rectify.
As for the sound... I will say that these BT speakers lack the low end bass that I like. So it wouldn't surprise me if I do a speaker swap sometime in the future. But my primary goal was to replace the garbage stock Boom crap with something the wife and I could actually hear well at highway speeds, and this setup will fit that bill nicely. This bad boy is LOUD, with more to give than I can handle!!! Like so many others here, this was just the first step in my audio journey. I'm sure a speaker upgrade is in my future at some point but I'll enjoy this for now.
Bottom line... I'm very satisfied with the BT solution and would highly recommend it to anyone looking for a good plug and play option from a company that provides great customer service.
Finally... Thanks to all the folks on this forum. The great posts and advice here helped with my install tremendously. I follow a number of forums on HDForums and this Audio Systems forum is by far the most informative, helpful and especially non-judgmental. Keep it up guys. Great work!!!!
Please post a pic and PM me an address so I can ship the award to you. I have had it for too long.
Paul

#5
03-05-2016, 09:17 PM
#6
03-05-2016, 09:20 PM
Feel free to post any questions. There's a lot of folks here that can help you. You're also welcome to drop me a PM if you like. It's all pretty fresh in my head (at the moment anyway).
#7
03-05-2016, 11:23 PM
Trending Topics
#8
03-05-2016, 11:35 PM

Nice work, thanks for posting the pix.
__________________________________________________ ____
For ROCKOUT information & purchasing please click the links below...
__________________________________________________ ____
For ROCKOUT information & purchasing please click the links below...
__________________

NO, they DON'T all do that!
ROCKOUT rocker shaft inserts... make the tapping STOP! From the guy that FOUND and CURED the problem NO ONE ELSE COULD, thank you for your support!
Ordering & info http://www.rockout.biz On ebay! ... CLICK HERE
Also on amazon.com...
Imitated, never equaled... ROCKOUTS!
Ordering & info http://www.rockout.biz On ebay! ... CLICK HERE
Also on amazon.com...
Imitated, never equaled... ROCKOUTS!

