horn bolts back on in the same spot. 1 larger bolt holds the horn bracket to the frame. Two small torx bolts hold the front of the plastic box to the horn bracket. Its easy to just remove the horn until the box is out then bolt the horn back on.
the whole thing takes 5 minutes if you have never done it before. 10 minutes if you don't know what tools are and have to hit it with your purse until the box falls out of the bike.
Unbolt it from the horn bracket, pop off 1 plastic clip (need to lift front of the tank) unplug the two plugs above the front cylinder head that go into the box, remove box, take to bench, remove a few little screws to remove the usb and wires inside.
Throw box in fire pit, plug the wires back in to the plugs above the cylinder head. All of the wires and connectors that were in the plastic box (2-3 of them) all fit up inside a large oval hole in the underside of the frames top tube that the box was covering.
then you can use a black zip tie to tie up the two big plugs above the cylinder head to keep them up and neat looking.
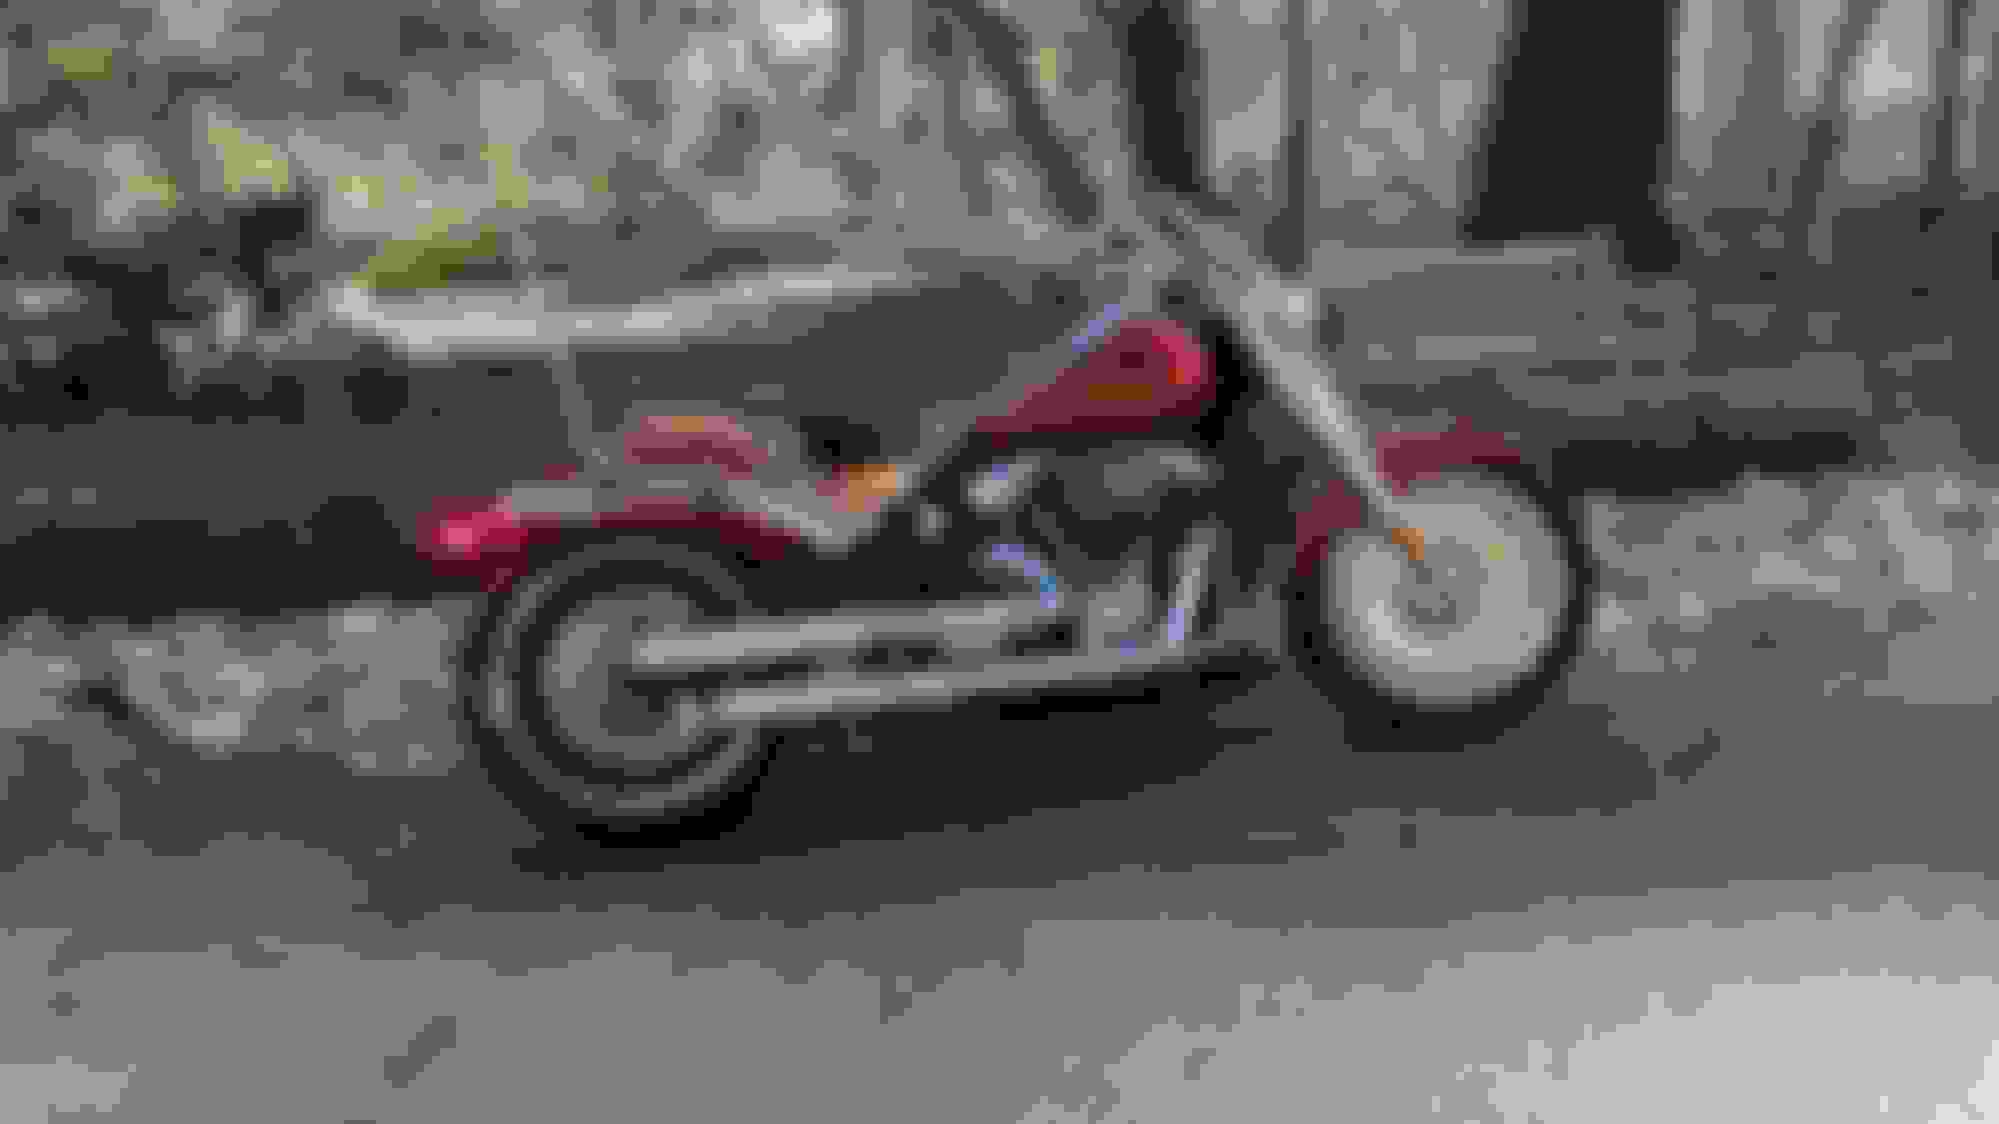
Installed a SDC Saddlemen today, still waiting on SPC pipes to ship.
VERY cool air cleaner insert there @Tha_Big_Ohh and you ride looks fantastic!
I bought the Saddleman SDC Pro version with the backrest insert and it's not ideal for me. Wish I would have bought the standard version like yours. I removed the backrest and placed a velcro patch over the backrest insert slot. lol
Last edited by Calif Fat Bob; 02-24-2023 at 11:24 AM.
VERY cool air cleaner insert there @Tha_Big_Ohh and you ride looks fantastic!
I bought the Saddleman SDC Pro version with the backrest insert and it's not ideal for me. Wish I would have bought the standard version like yours. I removed the backrest and placed a velcro patch over the backrest insert slot. lol
that blows, that was an expensive seat for sure. Maybe you can post it on the classifieds.
I didn't get to do much of anything to my bike in the past few months, but First Ride since my Gallbladder removal surgery.
I got out to go for some parking lot practicing, and to film stuff for a Tire Review of my tires for the M8 Fat Boy so I can make a video on it.
Checked the rear brake pads and they have plenty of meat left on them.
They say easy on-off so thinking it�s like a tube top or gaiter neck protector and it�s open on both ends and slides on and off�with elastic on the ends to keep it snug to the filter at both ends. They probably just slid it under the cover on top in their photo.
That said I�ll let you know when I get it next week�as I figured since the filter is always sold out, I would order it before they get sold out too. 😂
Thanks for the heads up @FranBunnyFFXII! 😁
So got the Fuelmoto Rain Sock Prefilter today in the mail. Going to be contacting them tomorrow.
Here�s what I found.
it�s like a garter with elastics on both ends and the rain sock in the middle�open on both ends.
note: I have not installed the filter yet so installed the rain sock on it on my workbench which should have made it easier to get it on as I can get a good angle on it to get it on�but not really.
It fits really tightly on the filter. It�s a bit of a pain to get on. Getting it off is no problem. I did this several times.
Not sure how long the stitching is going to last on the two elastic bands as it looks fragile�like it will fray/get snagged and unravel over time if you put it on/take it off a lot.
The rain sock when fully on (and I tried it with the seam in several different locations) has excess rain sock material in some spots and it pops up off the filter in some areas and in others the rain sock material isn�t wide enough to cover the filter completely�so there is exposed filter.
Tried it on both ways, and with the seam in different positions, and that didn�t solve the issues above and seen below in the pics.
It�s disappointing. The quality control on the one I got is lacking.
The BMF filter seems really good�looking forward to getting on the bike. The rain sock not so much.
Maybe the next batch will be better�
Hope others who bought it had better luck.
I�m sure Fuelmoto will take care of me to make it right�just not sure about this rain sock.
Here are some photos:
Pre Install:
Tried it with seam on end: (see the buckling/excess and the fit is not great)
Tried it with the seam in the middle (same issues):
Tried with seam in the middle: (doesn�t reach the bottom of the filter to protect it)
Finished my external breather today, happy with how it turned out! I bought high temp silicone hosing, so I shouldn't run into any heat related issues. All in all, I'm in it for under $60 with lots of spare grommets and hose clamps. Opted for a filter vs catch can after watching some videos, specifically the DK customs video. I'll plan on washing off the filter every oil change or two.
The parts:
Had some yellow gunk on the breather bolts and in the tube, hopefully now that crap will be filtering out of the bike rather than into it!
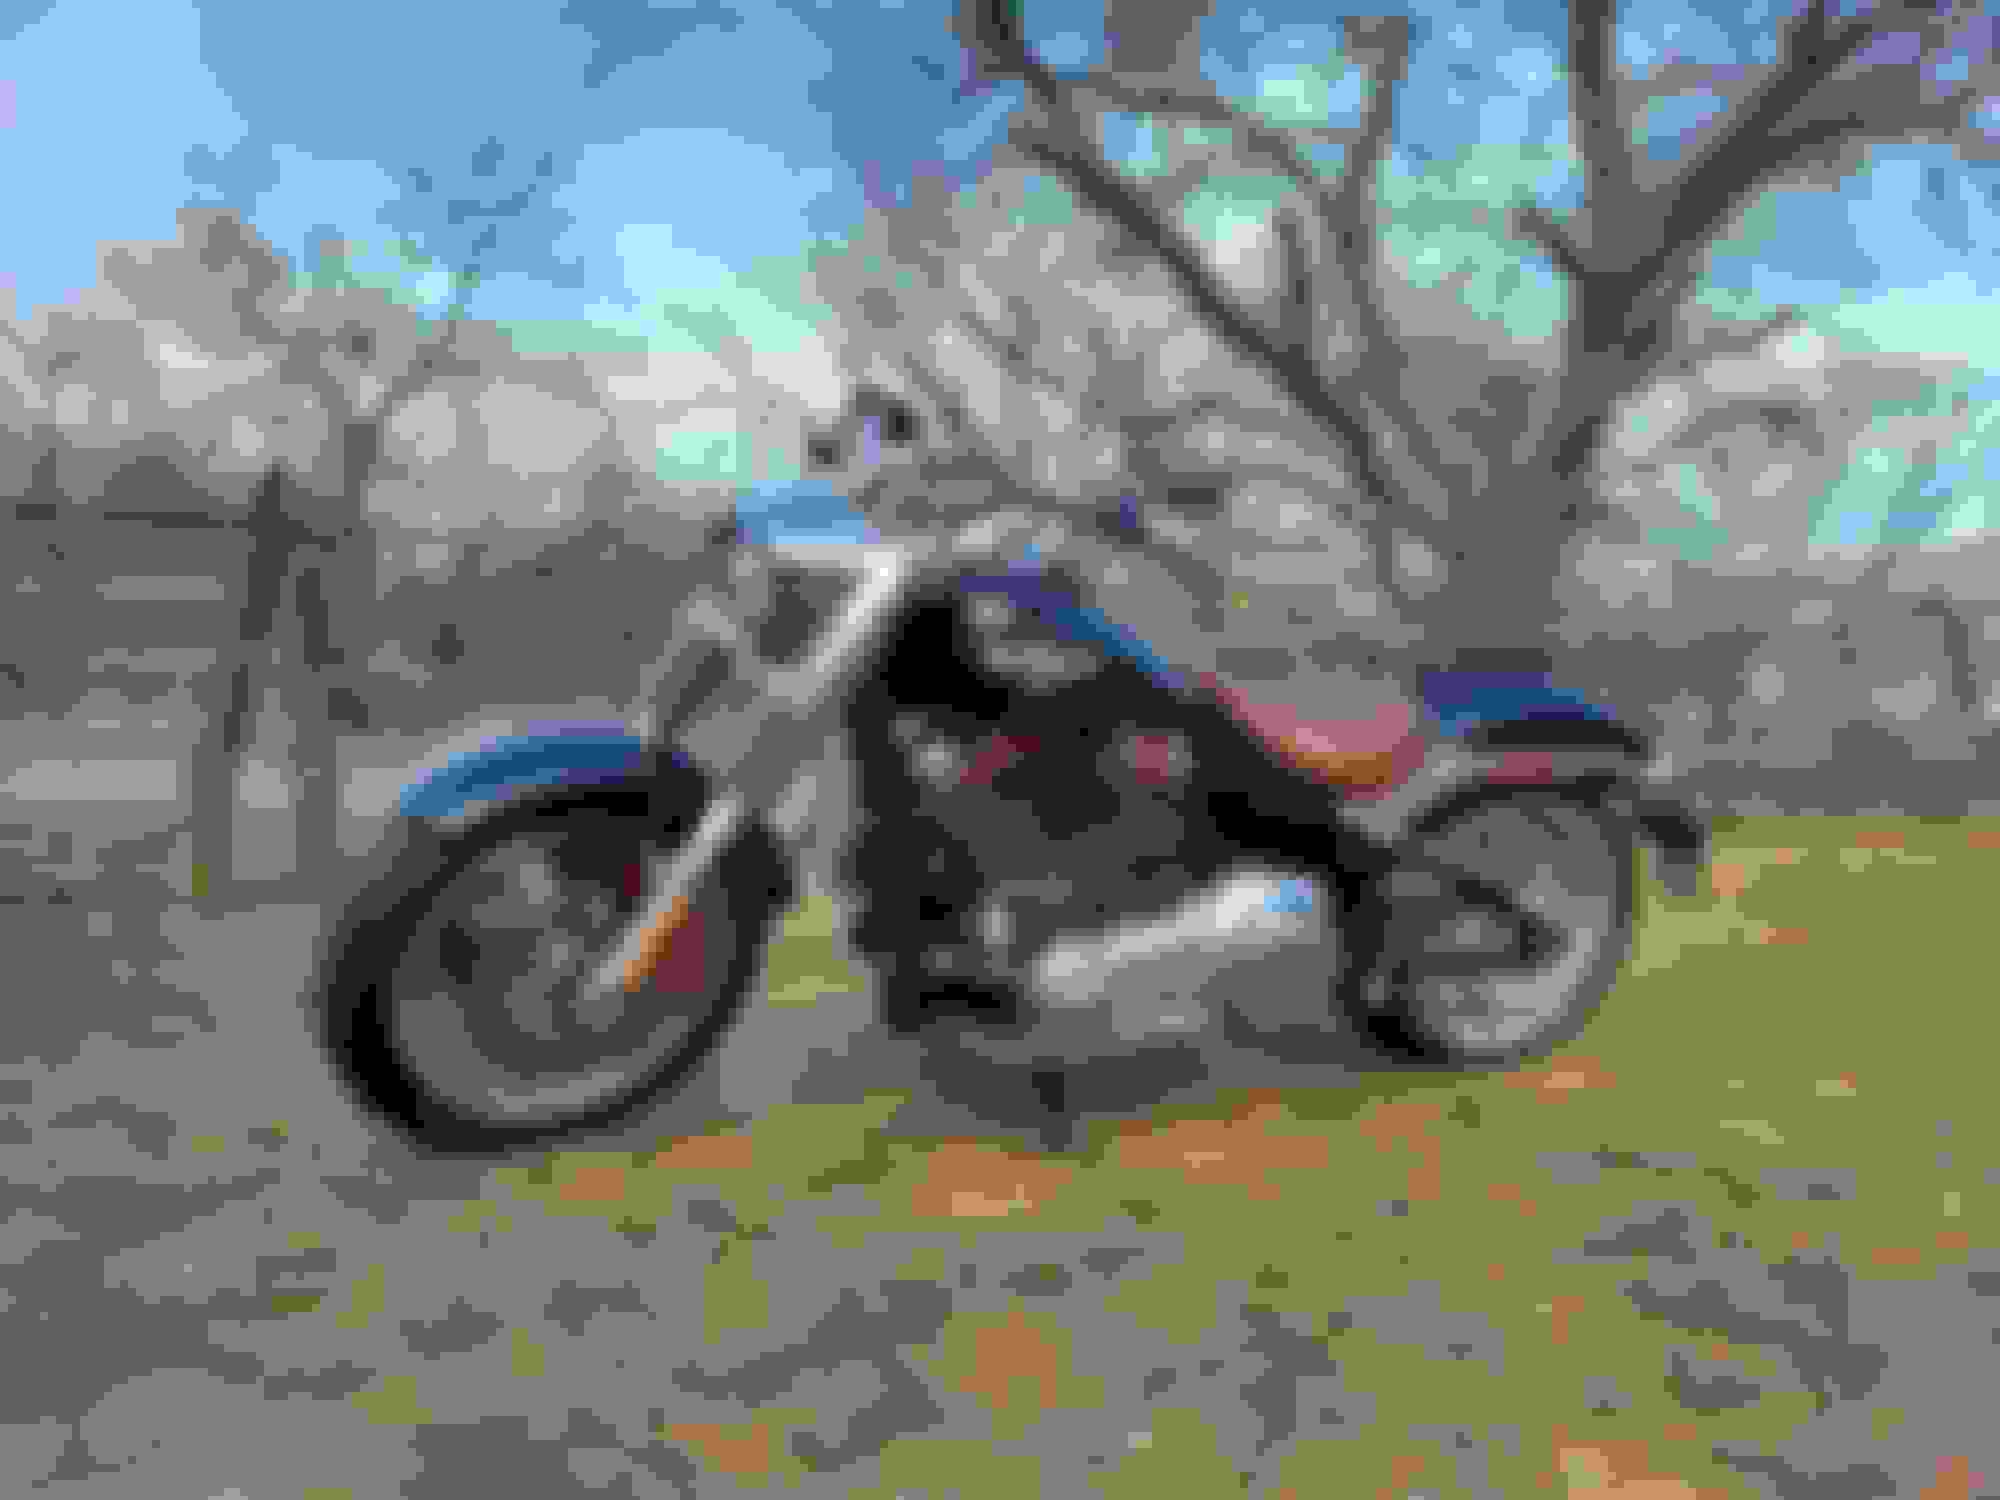
Greetings fellow FB's.
Been a few since I've trolled on here thought I'd update the ride.
Picked up a lift from Harbor Freight and put her up for a month. 2 Pirrelli's, new seat, luggage rack, polished the wheels and cleaned the frame, pinstriped
the front fender (will do the tank and rear fender later), , plugs/wires/oil and red powder coated front caliper.
Ready to roll this spring!
If that's an Angel GT 160/60 R18 rear you have on the front, you need to go back to the tireshop that put it on and have them reverse it's direction. The tread needs to be reversed on the front because of the way the joining spice works, and the way water evacuation and tread behavior works. Rear Tires are designed to accelerate, so the joining splice is angled in such a way that it pushes the splice together(compression) when the tire is under a load from throttle. A Front tire does the exact opposite, it's splice is the other way around so that when you brake the splice is pushed together.
When you put a rear tire on the front, it needs to go on the opposite direction of it's rotation indicator.
For Reference, this is from Avon Tires: https://www.avontyres.com/en-gb/tyre...orcycle-tyres/
CAN I FIT A FRONT TYRE ON THE REAR AND A REAR ON THE FRONT?
Avon would not normally recommend this fitment. If you do this however, due to the way tyres are manufactured, you should reverse the tyre�s direction of rotation if you fit a front tyre on the rear or a rear tyre on the front of your bike. During tyre manufacture, a length of tread rubber is wrapped around the carcass and joined together with an angled bevel type joint. This joint is orientated so that as the tyre rotates, this joint stays shut. As the rear tyre provides drive and the front tyre provides braking, the joint is made one way for the rear tyre and the opposite way for the front.
Last edited by FranBunnyFFXII; 02-28-2023 at 05:58 PM.
 02-24-2023, 09:37 AM