Harley Davidson Dyna Glide: Transmission Diagnostic Guide
Learn what causes various transmission symptoms and how to fix them, or when to call in the professionals.
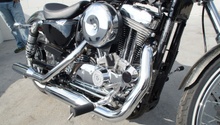
This article applies to the Harley Davidson Dyna Glide (1999-2016).
Transmission issues with your Dyna can be a bit tricky to figure out. Some perceived problems are not actually problems at all, but just characteristics of the bike. Other things might be telltale signs that something is going on that needs to be addressed as soon as possible. If you are new to bikes in general, or Harleys specifically, it can be a real stressful situation trying to figure out if you have a big problem on your hands. Fear not, some of the more common issues are things you'll get used to, and others aren't that serious and might be fixable in your own garage. Learn what the most common transmission issues are and if it needs fixing, or if it is just a normal characteristic of your bike.

Materials Needed
- Allen wrenches
- Torx bits
Step 1 – Clunk when letting out clutch
When you upshift or downshift and let out the clutch, you hear a loud clunking sound.
The loud clunking sound that you hear when you let the clutch out is the noise coming from the clutch basket and compensator. This is actually pretty normal. The Dyna and many others will make a clunk as power from the motor first meets the resistance of moving a big heavy bike. If the noise gets louder and the shifting gets a bit clunky as well, you may due for a primary, or transmission oil change; otherwise, a clunking noise is normal.
If your clutch or gear noise is more of a whine, it may be indicative of a problem.
Step 2 – Listen for a whine in lower gears
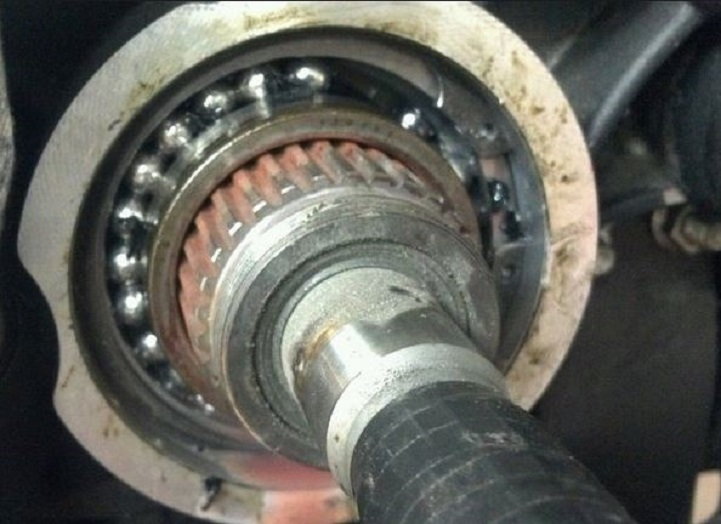
A whine in 1st or 2nd gear when the clutch is released may indicate an internal issue.
You may have an internal issue with the transmission. You will need to open up the transmission shaft and look at the bearings and races. This problem was common on the '06 and '07 models. You can look up your VIN on the Harley website to see all the recalls and service bulletins: Safety Recall Information. You might want to take yours to a dealer, who will have knowledge of the issue and can correct it if you are at all uneasy opening up the transmission. This isn't a DIY job for the novice wrench, and it is will likely be a pretty significant repair cost as well.
Step 3 – Listen for the whine in 5th gear
A common complaint among Dyna owners are a whining noise when they hit fifth gear.
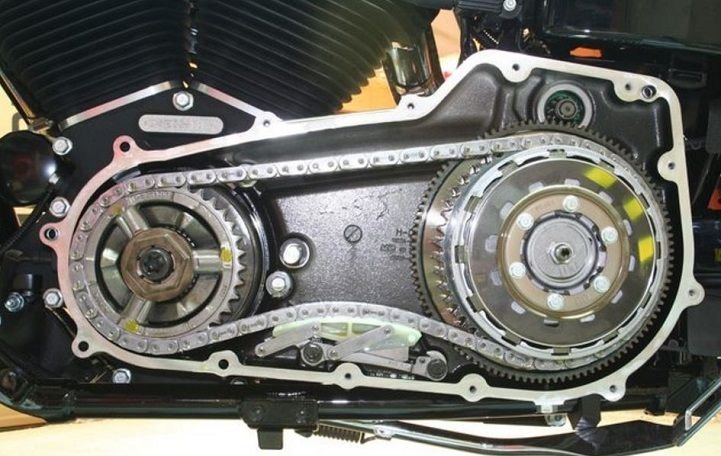
Check your primary cover and surrounding area to make sure that you don't have any leaks, and that the oil level just covers the bottom of the clutch. In '07 and earlier models, Harley used a helical cut on the fourth and the sixth gears, but the fifth gear had a straight cut. This caused the 5th gear to whine a good deal. If it becomes unbearable, Harley has a helical cut fifth gear that can replace the straight gear and eliminate the noise. This should be considered normal and not indicative of a problem that needs to be addressed.
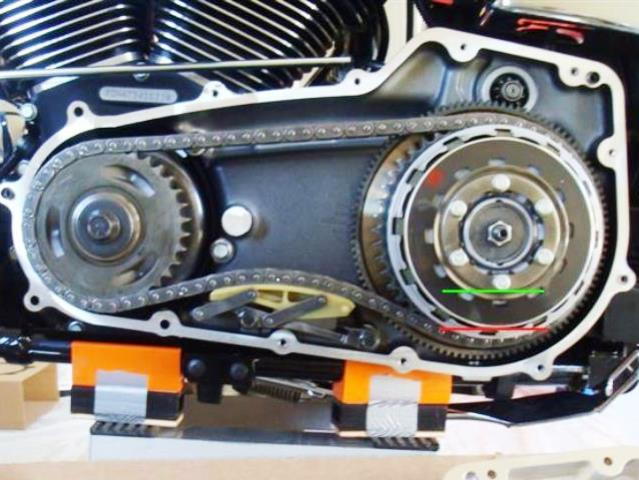
Figure 3. Red line is proper level for primary oil, with bike standing level. 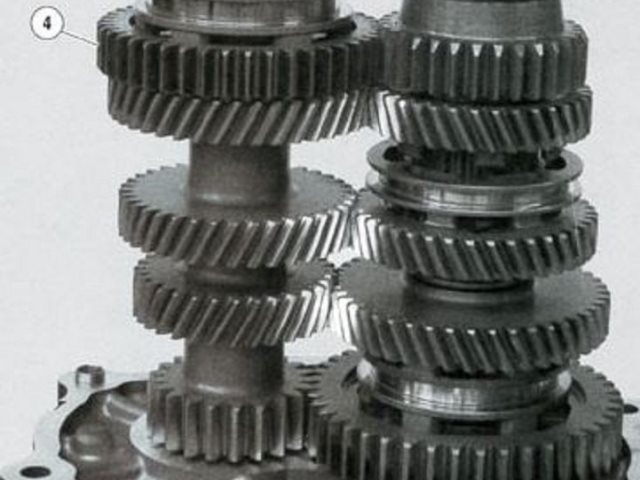
Figure 4. The center three sets of gears in this transmission are helical cut.
If your problem isn't just noise but actual difficulties in shifting, you most likely have some issues to address.
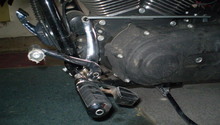
Step 4 – Inability to shift through lower gears in high temperatures
Connecting rod in primary may be really dirty.
Inside the primary is the shifting or connecting rod that passes through a tube through the primary. The primary is a really nasty, dirty environment and the inside of that tube can get pretty disgusting. In really hot temperatures and otherwise, as that rod heats up, it can expand and bind up. This will cause the shifter to not return back to the "neutral" or "center" position in between the gears. From here, it is not possible to shift into another gear. Other causes for this could be that the clutch or cable needs adjusting and the cable lubricated.
- Open up the primary and give it a good cleaning, especially inside the tube that the connecting shaft passes through.
- Check the clutch adjustment, and adjust it back to normal.
- Check the tension on the clutch cable, too loose, not letting you get the clutch fully disengaged.
- Make sure you are using the proper 20W-50 primary oil.
If your clutch is fine, check the shift linkage.
Step 5 – Check the shift rod
The shift rod may be bent or have become loose.
If you can no longer shift and the problem isn't with the clutch, there may be issues with the shift rod or shift arm itself.
- Check the shift lever rod coming out of the transmission for any play. The pinch bolts can stretch over time and cause slippage.
- Make sure that the shaft itself isn't bent (check to see if it shifts disconnected from the shift arm).
- The shift arm could be bent in the top of the transmission cover. Inspect that part. This is probably a more common problem than the shaft or rod bending.
- Loosen the Allen bolt on the arm, re-position the arm and re-tighten the bolt.

If your problem is with a Wide Glide, the problem could be the primary alignment.
Step 6 – Check out the primary alignment
The 2006 and earlier models had an issue with the primary case causing an alignment issue.
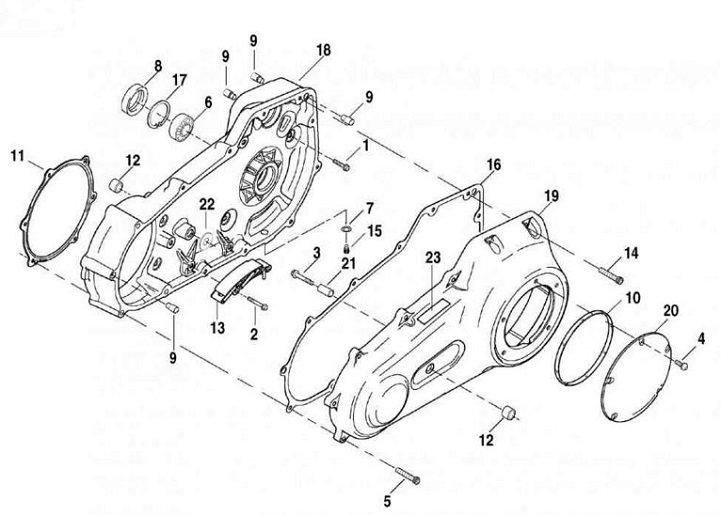
- Remove the outer and inner primary case covers.
- Replace the rear bearing and race.
- Install new alignment dowels in the inner case to keep the transmission, outer and inner cases lined up.
- The older case had two dowel bushings that connected with the transmission case. The newer cases have four dowel bushings.
- Replace the inner case and transmission case with the new four bushing configurations to keep the transmission properly aligned.
Related Discussions
- Are There any Dyna Transmission Problems? - HDForums.com
- Transmission Problems on FXDB? - HDForums.com
- Super Glide Shift Problems - HDForums.com
- Help! Possible Transmission Problems on My FXDS - HDForums.com
- 2006 Dyna Wide Glide Primary Problems - HDForums.com