


Parade Flag Holder
Thread Starter
|
Road Captain
Joined: Jan 2009
Posts: 510
Likes: 12
From: Arizona
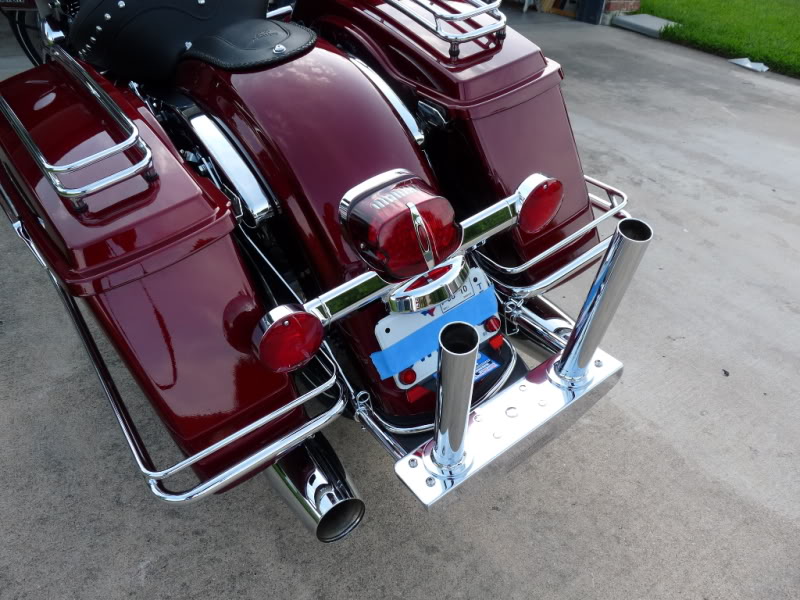
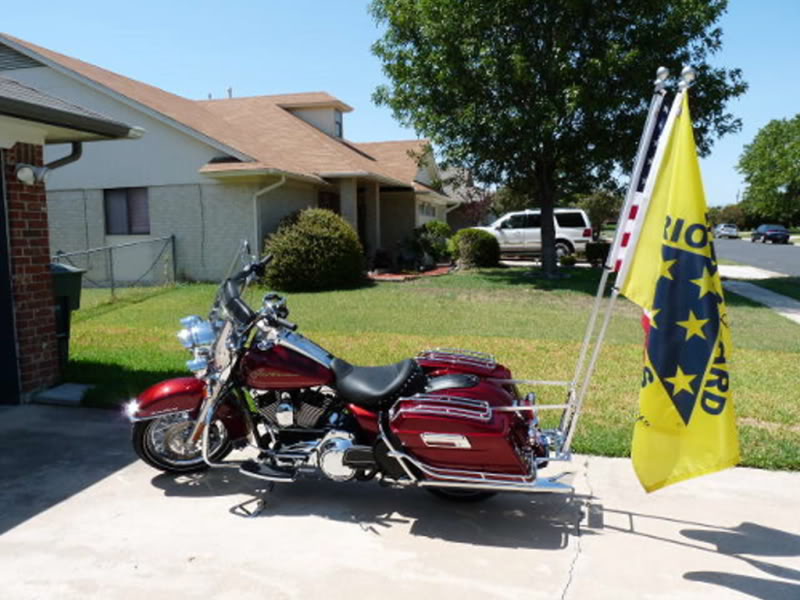
I use a RIVCO Parade Flag Holder with two large 3X5 flags and I am very happy with this setup. Its expensive (about 200 bucks for the '09) but the quality is about as good as OEM. The Chrome is mirror finish and the components are heavy and very well made, it is such a good looking piece that I normally leave it on the bike between missions. There are two heavy duty brackets permanently attached to the fender mounts which function as a receiver and the flag holder itself can be removed in seconds by removing two safety pins.
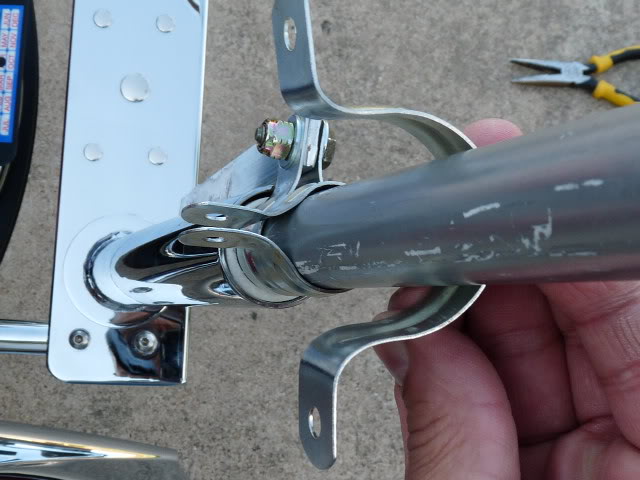
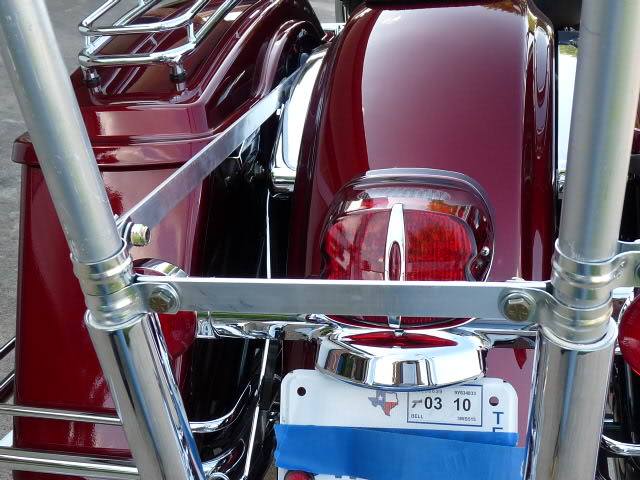
The Rivco pole sockets are 1 1/4" inside diameter. This is how it looks on the bike:
The Rivco mount about to be installed:
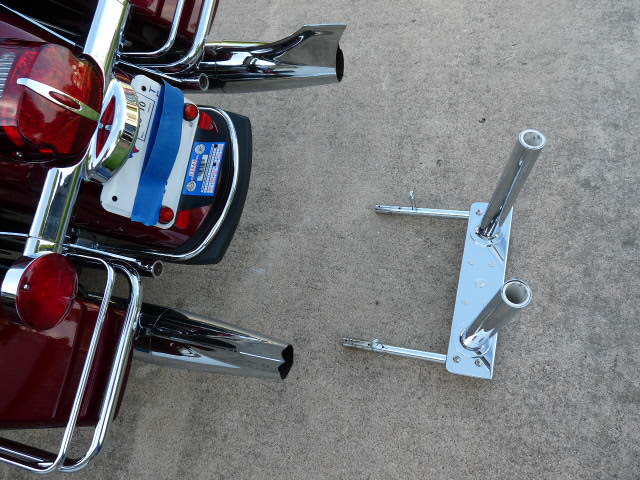
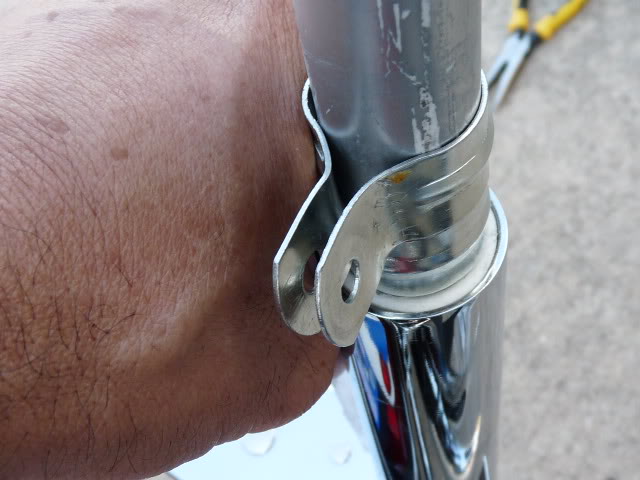
These brackets are permanently mounted to the fender supports:
Sometimes we escort remains from city to city and we have to drive in the freeway. Two large flags create a lot of drag, so I made braces from pieces of aluminum flat stock and 1 1/4" pipe straps to make sure they would stay in place, it ended up being a very secure system:
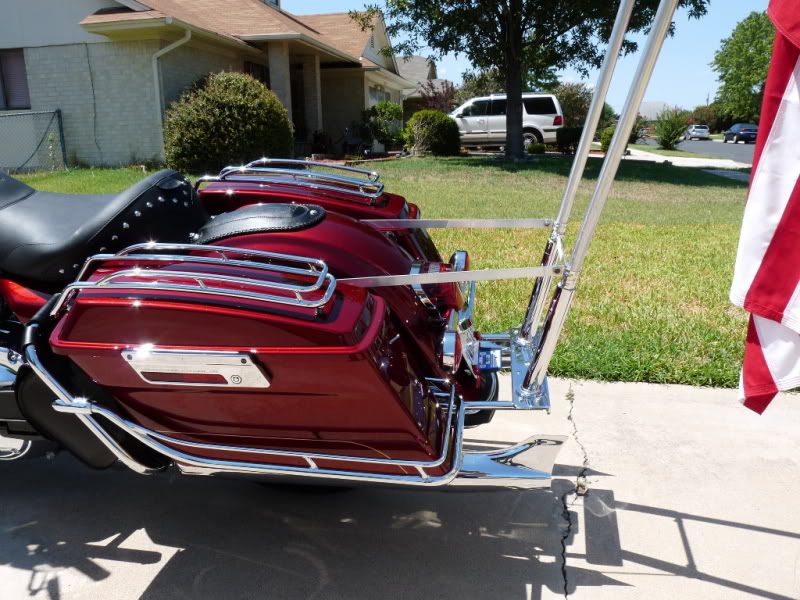
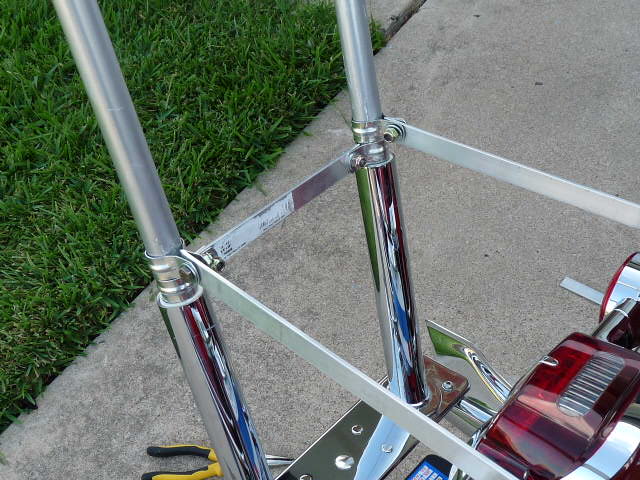
And this is what my rig looks like:
The Rivco pole sockets are not drilled for safety pins, so there is nothing to retain the flag poles in place. The first couple of runs I duct taped them in place, but on a windy day or at high speeds the drag caused by the flags bends the Rivco mount up and down, so I looked at making some braces, which turned out to be very easy and unexpensive. After a mission, I take them off by removing four nylocks (nylon lock nuts) and sliding the hook ends off the shock mounts. The materials came from Lowes or Autozone. This is what I did:
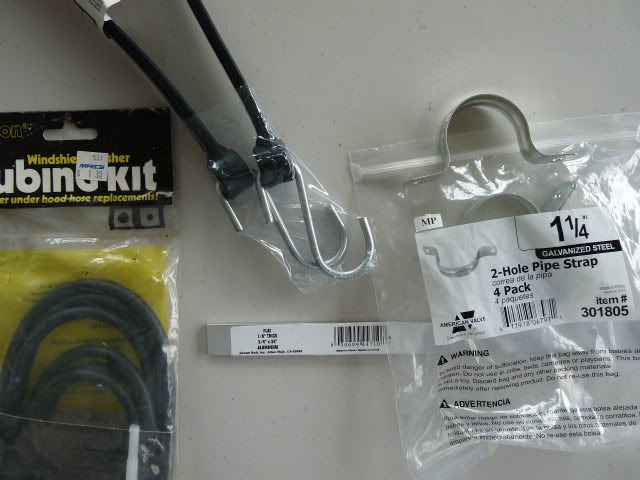
List of materials:
One rubber bungy cord (only the wire hooks will be used) from Lowes
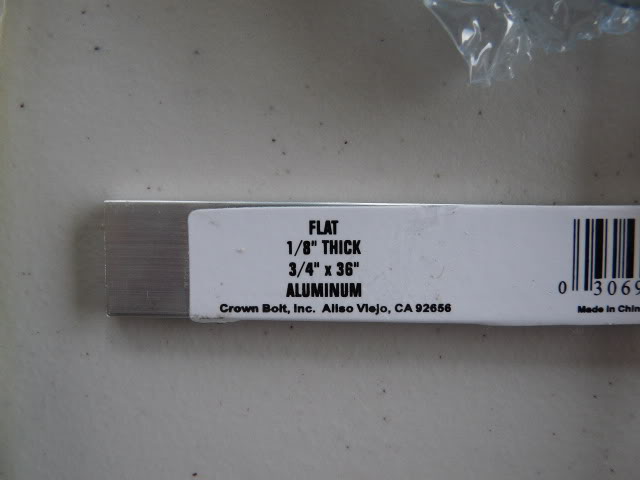
two pieces of aluminum flatstock, 1/8" thick, 3/4" by 36" from Lowes
one bag (4 ea) 1 1/4" pipe straps from Lowes
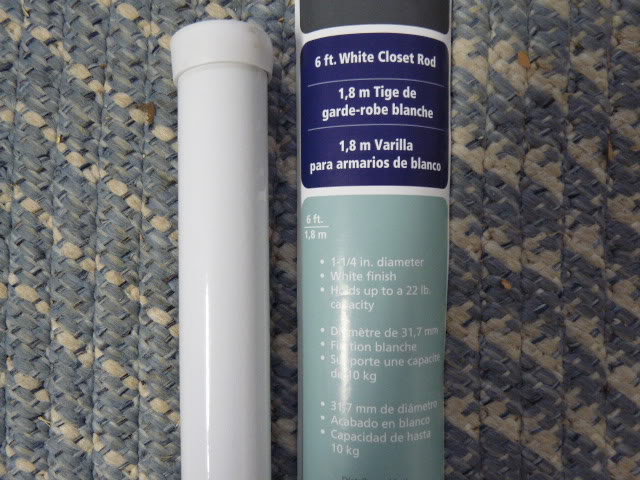
two clothes poles, 1 1/4" X 6 ft in length from Lowes
Auto window washer hose from Autozone
Four 1/8 X 1 1/2 bolts with nylocks from Lowes
This is the flatstock I used:
The flagpoles are clothes poles, also from Lowes. They are 6 ft in length, which is the right size so a 3 X 5 flag will not touch the ground or the exhaust, also, they are 1 1/4" in diameter, which is the right size for the Rivco pole sockets:
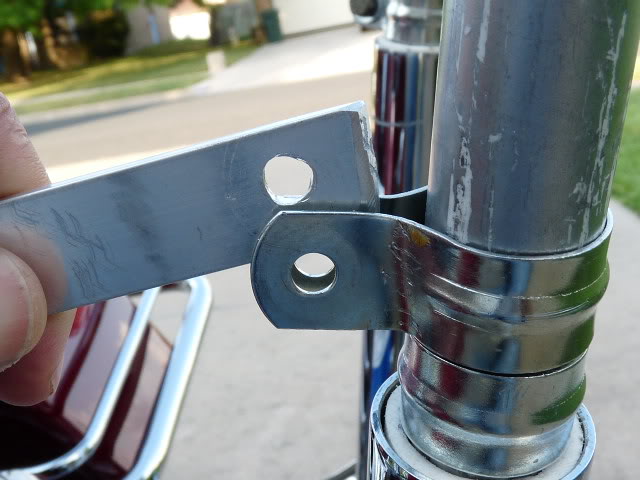
Install one pole in the holder and bend a pipe strap over it:
It should look like this:
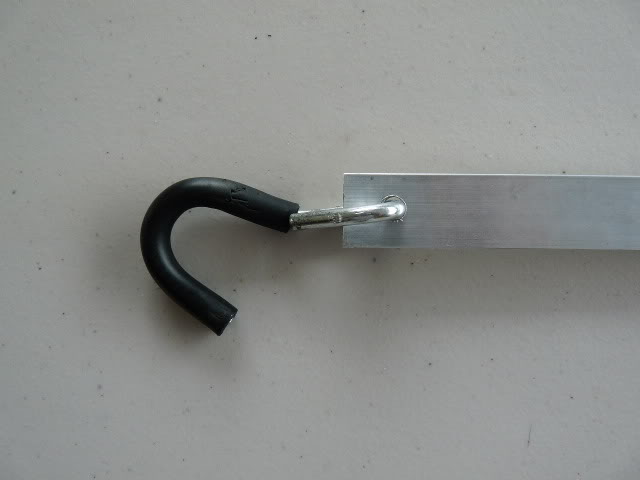
Drill a hole on one of the ends of a piece of flatstock. Attach a hook to it from the rubber bungy cord. Bend the hook with pliers and slide a wet piece of rubber washer hose over the hook:
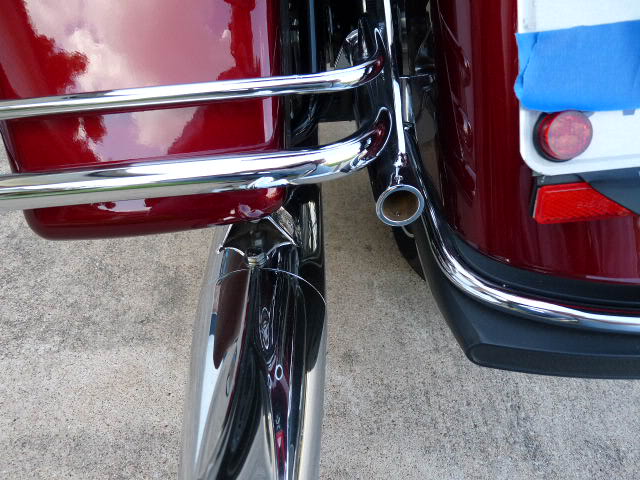
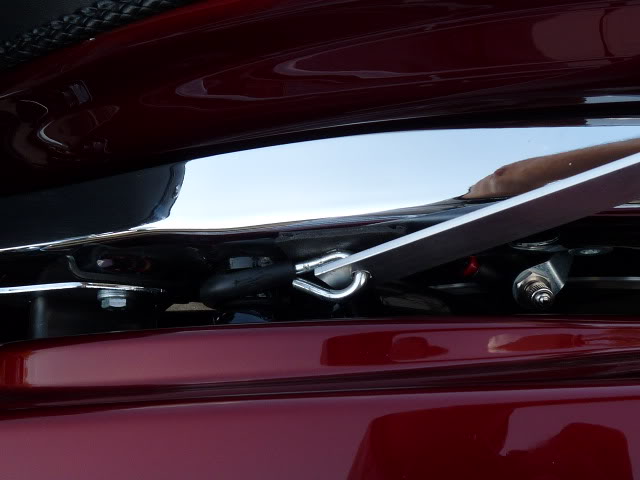
Slide it into the upper shock mount. It should slide on and off easy:
Hold the other end next to the pipe strap so you can mark the hole for the bolt and to cut the flatstock to size. First, cut the flatstock, then drill the hole just a bit short, about 1/8" so the flagpole will be under a little tension instead of loose:
Now make the bracket for the other side, same procedure as above.
Then,
Use one of the pieces left over from the flatstock and make a "pole to pole" brace using the other two pipe straps that came in the bag:
Attach all the pieces loose to verify fit before tightening everything up:
My bike is stable again, up to a point. At speeds around 75-80 (yep, speed limit is 80 on the Interstates) or on extremely windy days, its still a bear to handle, but nowhere like it was before the braces, they are definitely worth the price and the 20 minutes or so it took me to fabricate them.
The PGR flag came from here: http://www.shop.twistersstore.com/pr...0&categoryId=6
this is a very high quality flag, with many missions at freeway speeds without fraying.
The US flag I bought locally, it needs to be a "storm flag" so it doesn't fray either.
US Code, Title 4, Chapter 1 (go here: http://www.law.cornell.edu/uscode/ ) states that a flag mounted next to the US flag cannot be at the same level, without specifying a measurement, so I mounted the PGR flag about 1/2" lower than the US flag, thus meeting the intent of the US Code and looking good at the same time. Code does specify that the US flag goes on the right side.
Regards,
The Rivco pole sockets are 1 1/4" inside diameter. This is how it looks on the bike:
The Rivco mount about to be installed:

These brackets are permanently mounted to the fender supports:

Sometimes we escort remains from city to city and we have to drive in the freeway. Two large flags create a lot of drag, so I made braces from pieces of aluminum flat stock and 1 1/4" pipe straps to make sure they would stay in place, it ended up being a very secure system:
And this is what my rig looks like:
The Rivco pole sockets are not drilled for safety pins, so there is nothing to retain the flag poles in place. The first couple of runs I duct taped them in place, but on a windy day or at high speeds the drag caused by the flags bends the Rivco mount up and down, so I looked at making some braces, which turned out to be very easy and unexpensive. After a mission, I take them off by removing four nylocks (nylon lock nuts) and sliding the hook ends off the shock mounts. The materials came from Lowes or Autozone. This is what I did:
List of materials:
One rubber bungy cord (only the wire hooks will be used) from Lowes
two pieces of aluminum flatstock, 1/8" thick, 3/4" by 36" from Lowes
one bag (4 ea) 1 1/4" pipe straps from Lowes
two clothes poles, 1 1/4" X 6 ft in length from Lowes
Auto window washer hose from Autozone
Four 1/8 X 1 1/2 bolts with nylocks from Lowes

This is the flatstock I used:

The flagpoles are clothes poles, also from Lowes. They are 6 ft in length, which is the right size so a 3 X 5 flag will not touch the ground or the exhaust, also, they are 1 1/4" in diameter, which is the right size for the Rivco pole sockets:

Install one pole in the holder and bend a pipe strap over it:

It should look like this:

Drill a hole on one of the ends of a piece of flatstock. Attach a hook to it from the rubber bungy cord. Bend the hook with pliers and slide a wet piece of rubber washer hose over the hook:

Slide it into the upper shock mount. It should slide on and off easy:

Hold the other end next to the pipe strap so you can mark the hole for the bolt and to cut the flatstock to size. First, cut the flatstock, then drill the hole just a bit short, about 1/8" so the flagpole will be under a little tension instead of loose:

Now make the bracket for the other side, same procedure as above.
Then,
Use one of the pieces left over from the flatstock and make a "pole to pole" brace using the other two pipe straps that came in the bag:

Attach all the pieces loose to verify fit before tightening everything up:

My bike is stable again, up to a point. At speeds around 75-80 (yep, speed limit is 80 on the Interstates) or on extremely windy days, its still a bear to handle, but nowhere like it was before the braces, they are definitely worth the price and the 20 minutes or so it took me to fabricate them.
The PGR flag came from here: http://www.shop.twistersstore.com/pr...0&categoryId=6
this is a very high quality flag, with many missions at freeway speeds without fraying.
The US flag I bought locally, it needs to be a "storm flag" so it doesn't fray either.
US Code, Title 4, Chapter 1 (go here: http://www.law.cornell.edu/uscode/ ) states that a flag mounted next to the US flag cannot be at the same level, without specifying a measurement, so I mounted the PGR flag about 1/2" lower than the US flag, thus meeting the intent of the US Code and looking good at the same time. Code does specify that the US flag goes on the right side.
Regards,
Last edited by TooEasy; Jun 19, 2010 at 10:12 AM.

Stage I
Joined: Aug 2009
Posts: 1
Likes: 0
From: ohio
I like your setup. I just purchased the Rivco mount and since I have an o7 Roadking, I would like to mimick your set up. However, I can't find the electrical connecters you used . If you could refer me to where you purchased them, I would really appreciate it. Thanks
"Utopian Overlord"
Joined: Jun 2009
Posts: 1,180
Likes: 1
From: Union, Mississippi
Dog: post photos of your passenger foot pegs (if they're still on) and your sissy bar. I'm working on a flag mount that attaches to the pegs, using PVC and hardwood. First run was this morning with a single 3x5...there will be a few design changes before I'm done. If mine works out OK, you might want to put one together yourself.
Thread Starter
|
Road Captain
Joined: Jan 2009
Posts: 510
Likes: 12
From: Arizona
They are clothes poles, the kind that go in a closet. I bought them a Lowes for about 9 bucks apiece. For a 3X5 flag they need to be 6 ft long, and they are the right diameter for the holder. They come in white, but a rattle can can fix that, and they are strong, I have had my bike at 80 MPH with no problem.
Trending Topics
Road Master
Joined: Mar 2006
Posts: 828
Likes: 8
From: western Mass
I also use and love the Rivco mount. I've been using it for over 2 years now. It is excellent. Over time, the chrome finish will deteriorate (at least in some climates.) Also, whatever set up you use, whether it's home made or commercially available, it is going to weaken over time, so even though it's been tested by you at highway speeds and has held up, it is NOT always going to do so. It will fail eventually, so give a thought to your own safety as well as those around and behind you. Here in Mass we HAVE had a flag come off a bike at speed; so we no longer run with open flags on the highway. Also, please note that at least on the Rivco mount pictured, there is a warning label from the manufacturer that clearly states it is meant for parade speeds only! ("official" parade speed is 11mph.) Please keep this in mind so our mission does not end up causing a tragedy! Thanks to all and ride safe!
HD Forum Stories
The Best of Harley-Davidson for Lifelong Riders

Harley-Davidson Fat Boy Becomes a Dark, Decepticon-Inspired Custom
Verdad Gallardo
6 Weirdest Harley-Davidsons Ever Sold to the Public
Verdad Gallardo
7 Times Harley-Davidson Chucked Tradition Out the Window
Verdad Gallardo
7 Surprising Harley-Davidson Products that Are Not Motorcycles
Verdad Gallardo
8 Best Harley-Davidson Motorcycles Ever
Pouria Savadkouei
10 Worst Harley-Davidson Motorcycles Ever
Pouria Savadkouei
Killer Custom's Jail Break Is The Breakout That Refused to Blend In
Verdad Gallardo
Crazy Bunderbike Build Looks Amazing, But Is It Impossible to Ride?
Verdad Gallardo
Harley-Davidson Reveals Super Cool Cafe Racer Concept
Verdad GallardoThread Starter
|
Road Captain
Joined: Jan 2009
Posts: 510
Likes: 12
From: Arizona
I also use and love the Rivco mount. I've been using it for over 2 years now. It is excellent. Over time, the chrome finish will deteriorate (at least in some climates.) Also, whatever set up you use, whether it's home made or commercially available, it is going to weaken over time, so even though it's been tested by you at highway speeds and has held up, it is NOT always going to do so. It will fail eventually, so give a thought to your own safety as well as those around and behind you. Here in Mass we HAVE had a flag come off a bike at speed; so we no longer run with open flags on the highway. Also, please note that at least on the Rivco mount pictured, there is a warning label from the manufacturer that clearly states it is meant for parade speeds only! ("official" parade speed is 11mph.) Please keep this in mind so our mission does not end up causing a tragedy! Thanks to all and ride safe!
The brackets above the holder eliminate all this movement, period.